Admit it, you, too, keep piling up your books with unnecessary scrapbooks, flyers, or old calendars? And then they always fall out, and bad printing is imprinted on the pages? Why all these problems, if you can make funny paper bookmarks with your own hands for books in just a few minutes. Let's tell!
1. Bookmark with three-dimensional paper flowers
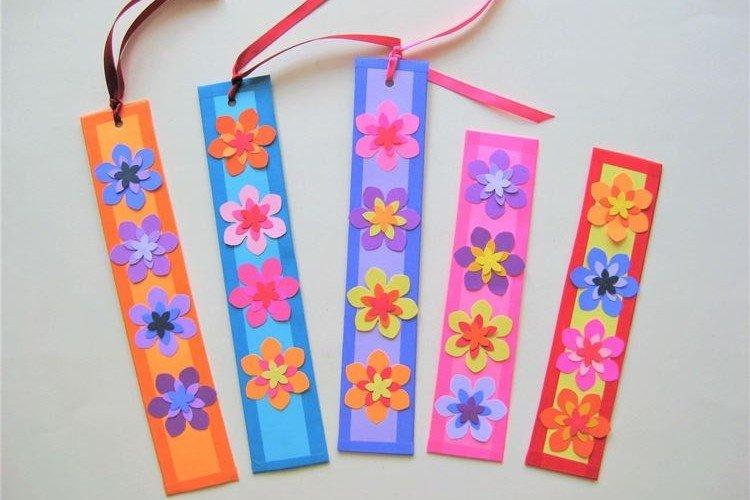
For such a simple but very bright bookmark, you need as much thick multi-colored paper as possible. Cut out a thin rectangle from it for the base, paste over the edges with tape a few shades darker and thread a narrow ribbon. To make the flowers look more interesting and lively, lay out each of them from at least three layers glued only in the center.
2. Tab "Variegated worms"
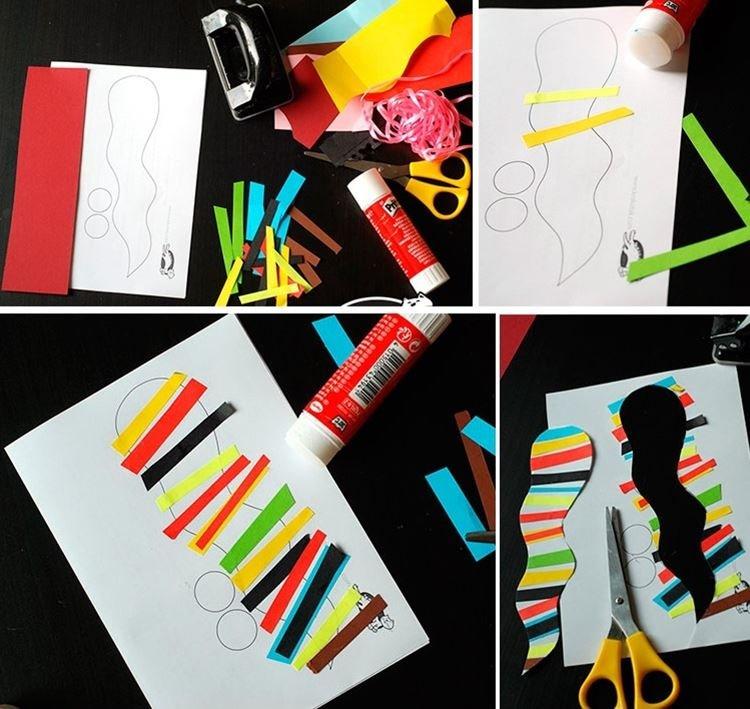
If you have a lot of unnecessary scraps of colored paper, serpentine or tape, make a bookmark for the book in the form of a motley cheerful worm. Draw a contour on thick paper and randomly glue it with multi-colored stripes, and then carefully cut it out. Make the eyes of the worm and a contrasting colored backing with tape.
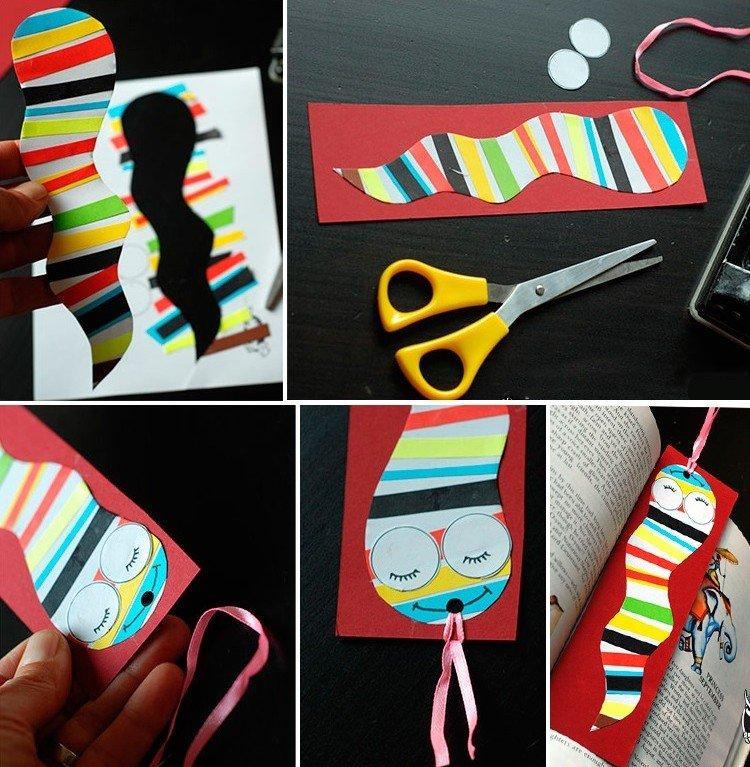
3. Origami bookmark "Heart"
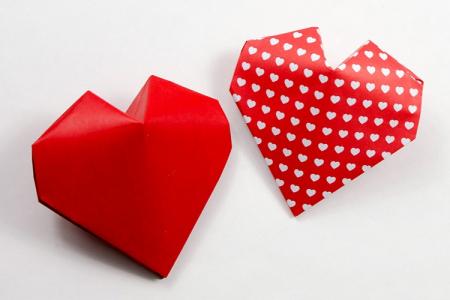
Using folds, divide the paper square into four equal parts. Tilt the bottom towards the center, turn the leaf over, fold the corners, turn it over again and lift the top. On the reverse side, straighten the folds and form a heart out of each vertex. Last but not least, bend back the extra "tails" or even fix them with glue.
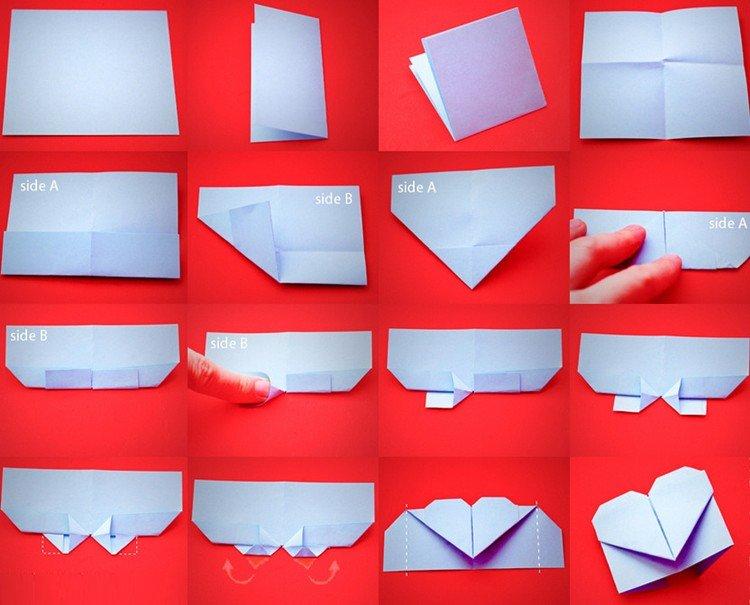
4. Paper bookmark "Cute cats"
These cats are best made from multi-colored sticker paper because it is thick and double-sided. Use a sharp clerical knife to cut the legs, which will hold onto the page. Cut out the ears, draw the muzzle, fingers, claws and other details with felt-tip pens.
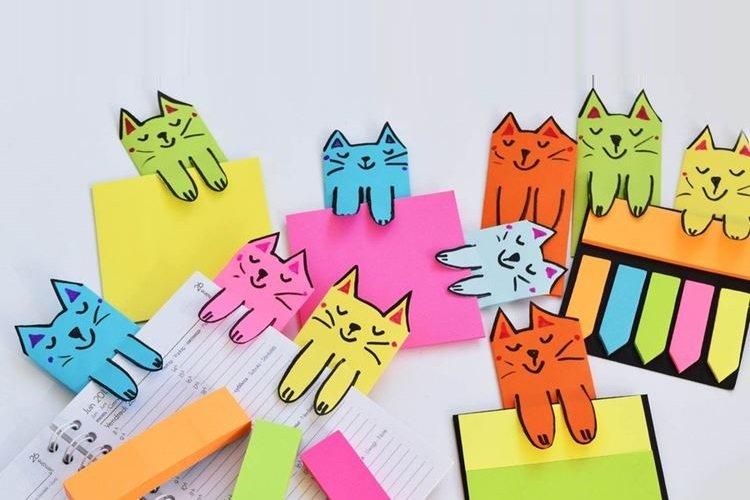
5. Shortcut bookmark
To make a beautiful bookmark in the form of a shortcut, cut out a blank book with a window from a thick sheet of paper. Glue a piece of wrapping paper or a bright sticker into it, fold the bookmark and thread the ribbon. By the same principle, you can make postcards or small pendants with wishes for gifts.
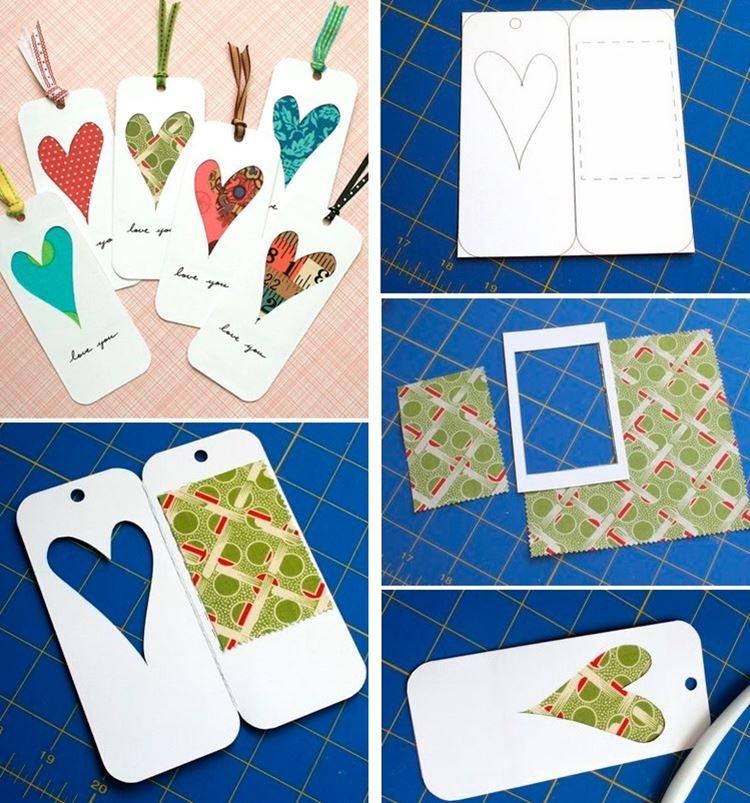
6. Origami bookmark for books "Monster"
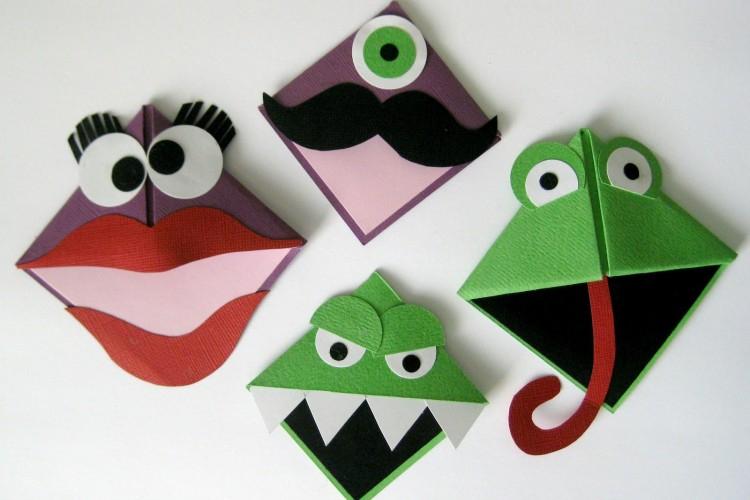
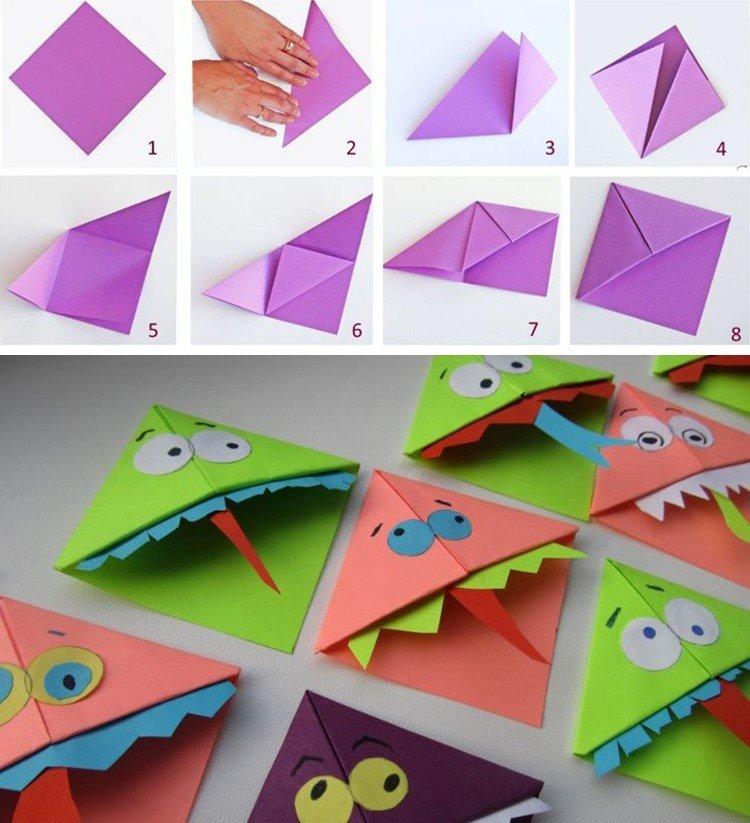
To make an origami bookmark for books in the form of a funny monster, fold a corner of a thick double-sided sheet of paper according to the pattern. Take the brightest or most unusual shades - and it will turn out even more interesting. Cut out the eyes, teeth and tongue separately, and add the remaining details. It is convenient to put such a bookmark on the corner of the page - it will definitely not fall out and will not get lost.
7. "Big-eyed" bookmarks
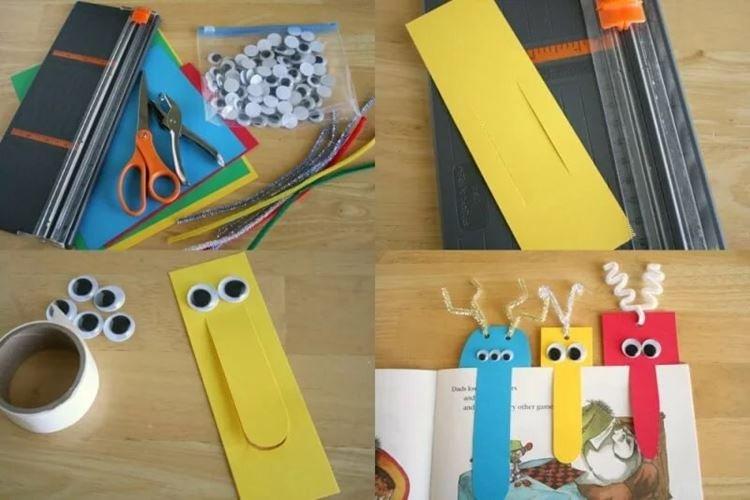
This is another variation of fancy paper bookmarks in the form of fantastic creatures. Decorate them with eyes for crafts - and the children will be delighted. Instead of the usual ribbon, insert fancy horns and ears made of wire or metallized cord.
8. Paper bookmark "Tie"
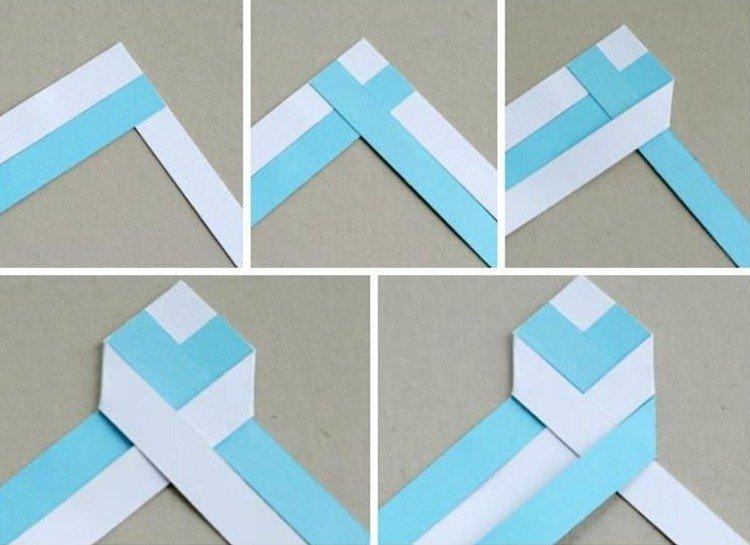
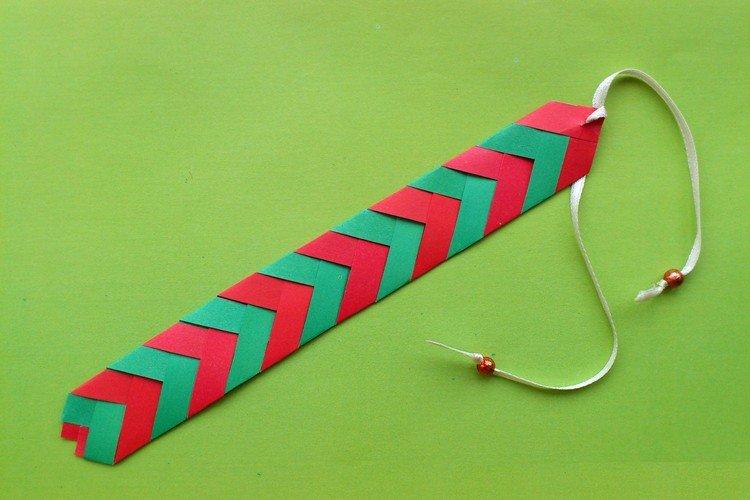
To make such a wicker bookmark for books, you will need four strips of thick paper in different colors. Vary the width and length, depending on the result you want to get. Glue the strips along the corner one on top of the other and lash the bookmark with a spikelet until you reach the end.
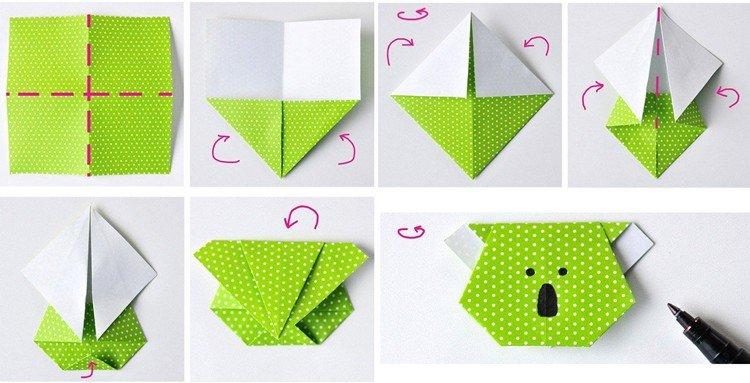
9. Origami bookmark "Koala"
A bookmark made of paper in the form of a koala differs from the usual corner in the folding technique, and it is not put on the corner, but on the page as a whole, like a paper clip. A piece of wrapping paper with a white backing, which just goes over the ears, is perfect. Form a rhombus from a square, tuck the sides and bottom corner, unfold the workpiece and lower the "tail" of the paper clip back.
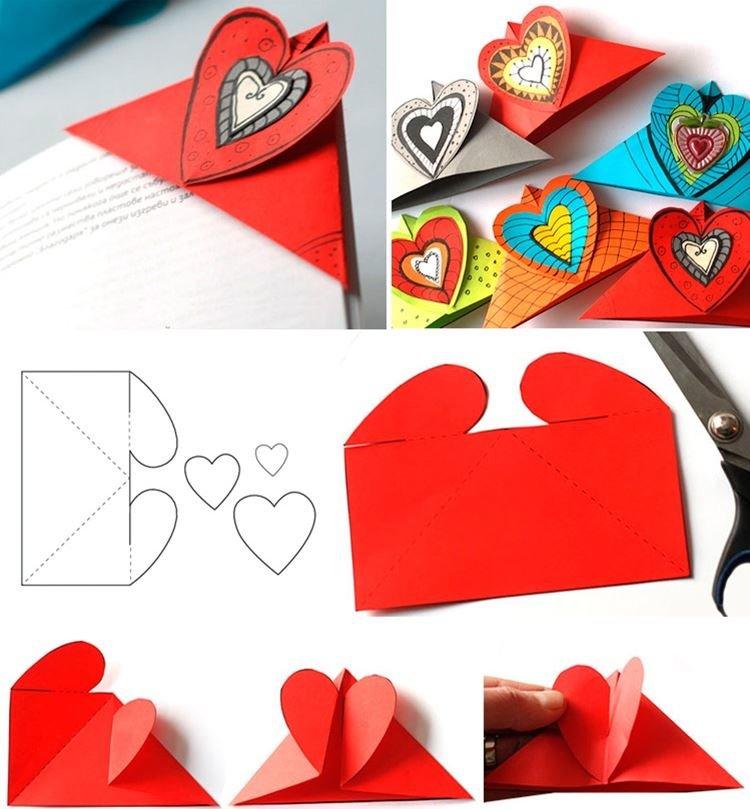
10. Bookmarks-corners in the form of a heart
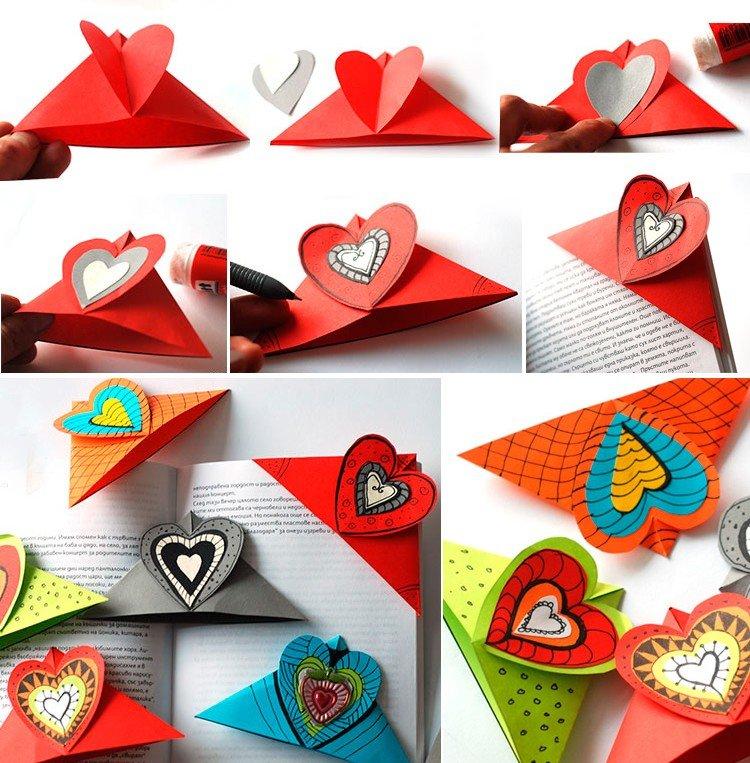
For such a corner bookmark, you don't even need to master the origami technique - just prepare a stencil according to the template on the diagram. Fold the piece so that the halves of the heart come together.
To keep them on their own, you can make small cuts. Cover the joint with small multi-colored hearts on top, paint or decorate with colorful stickers.
11. Bookmark from paper "Hedgehog"
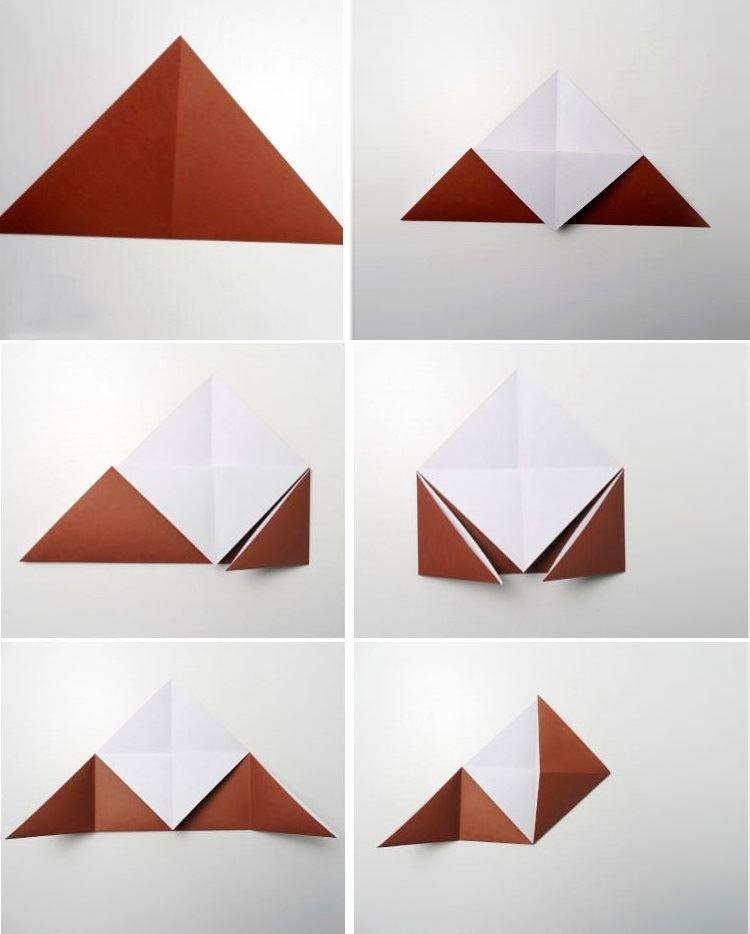
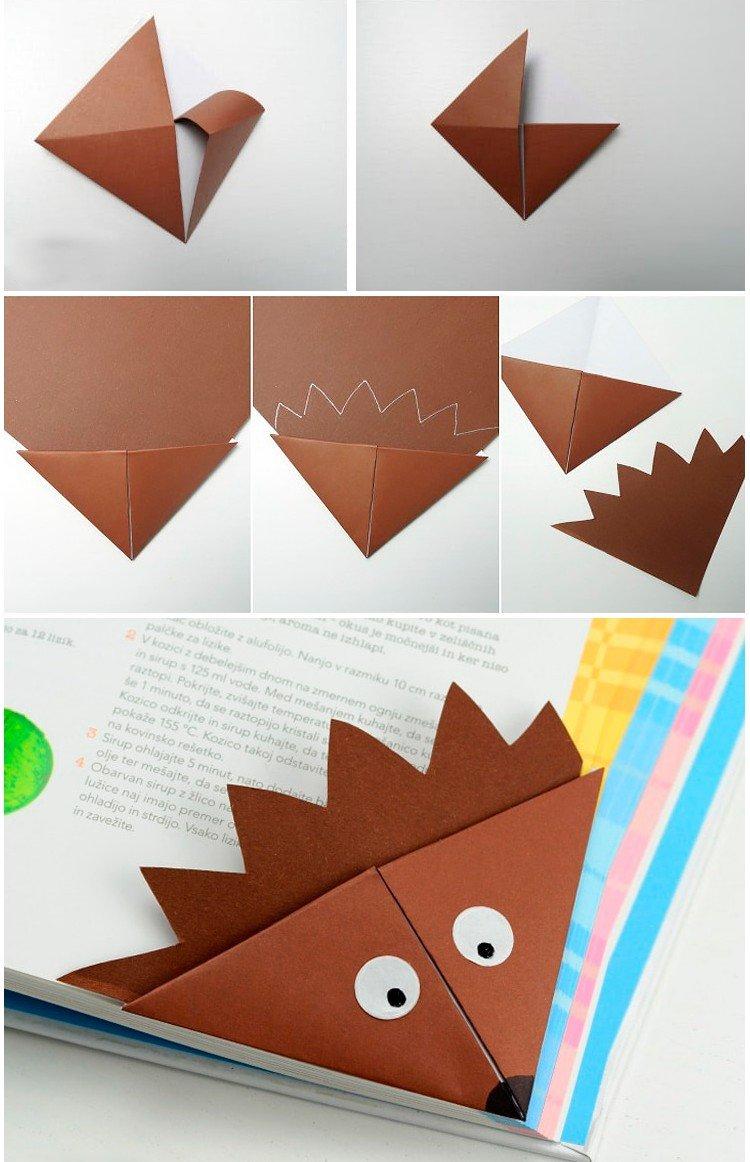
To make such a bookmark with your own hands, bend the paper rhombus in half, lower one vertex of the triangle and bend the sides to it. Spread them up and tuck the corners inward to create a pocket for the page. From another one-layer triangle, make hedgehog needles and glue them in the middle. All that remains is to draw or glue the muzzle and nose.
