Homemade paper boxes are an invaluable household item. They can be used not only to wrap gifts, but also to be used instead of boxes, organizers and boxes. And for their production, anything is suitable: from old packaging cardboard to wrapping paper or a regular A4 sheet!
1. Simple wrapping paper box
This box consists of two parts - a base and a lid, so you can take two different sheets of paper. Cut out a square of the desired size, draw diagonals, bend one of the corners to the center, and again. Unfold the corner and repeat the same for the rest of the sides - you will be folding according to this markup.
Make cuts on both sides of the workpiece, one section not reaching the middle. Fold the corners towards the center, lift the sidewalls and fold the edges to the sides. Turn inward, glue the remaining protruding parts - and your workpiece will have a neat not only outer, but also inner side. Use the same principle to fold the second part and assemble the box.
2. Origami box without lid
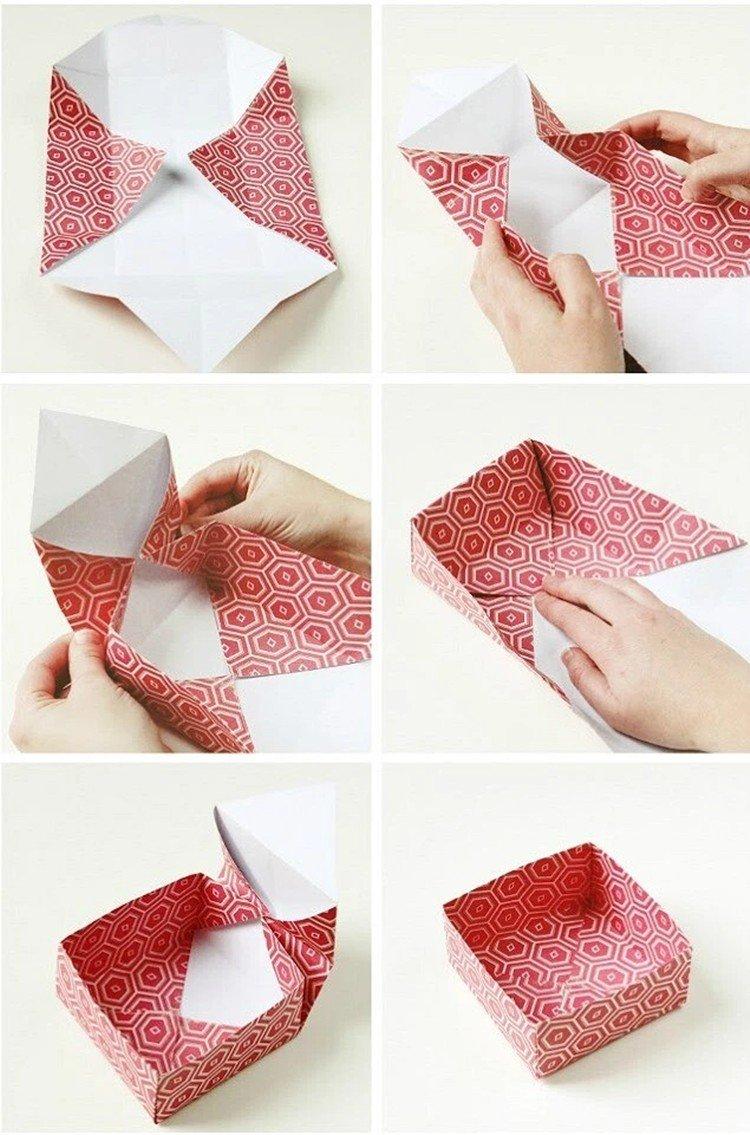
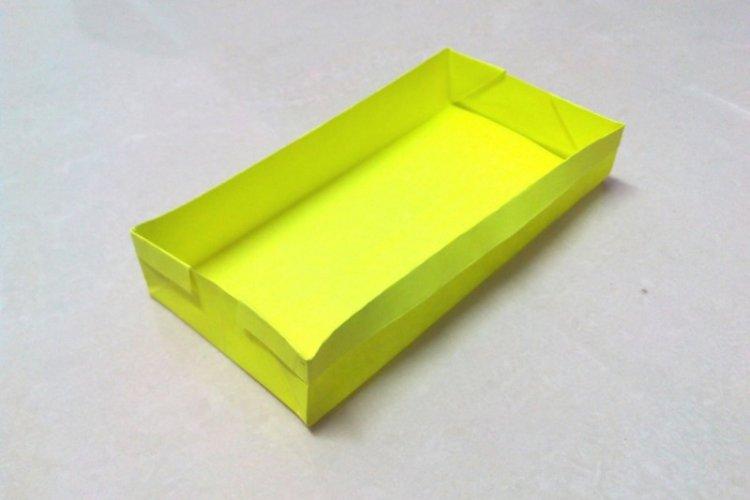
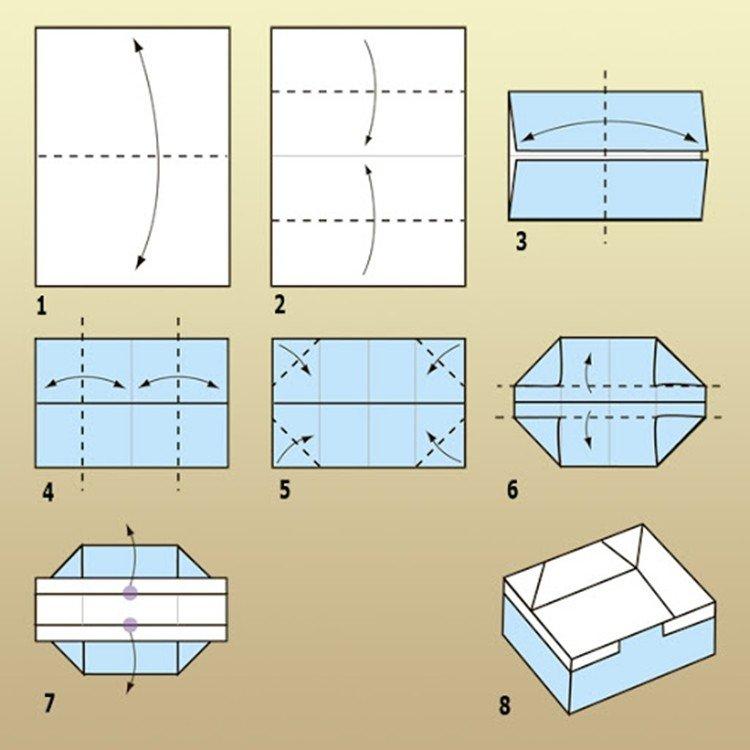
Fold a sheet of A4 paper in half, unfold and fold both sides from above and below to the middle. For a folded workpiece, use the same principle to mark the center and middle of each part. Wrap the corners, just short of the center line, and turn the sides by about a centimeter. After that, straighten the box and gently straighten all the corners.
3. Origami box with lid
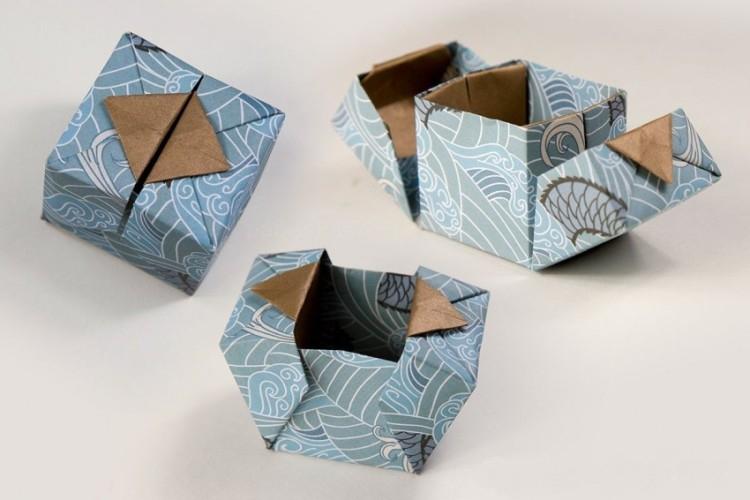
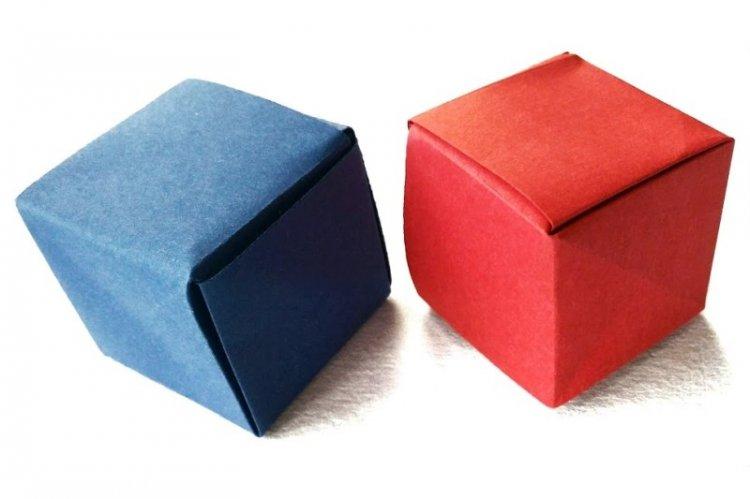
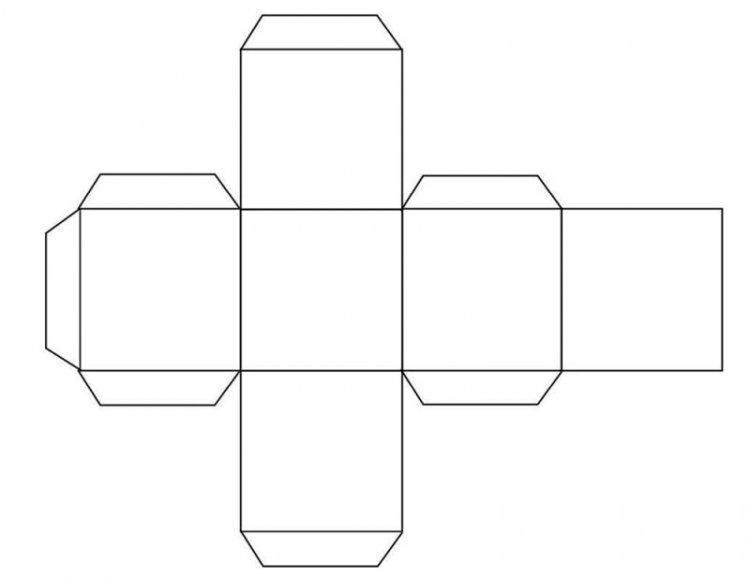
The good thing about the cube box is that it consists of one blank and you don't need to assemble the lid separately. And it is also very easy for her to vary the sizes, because at the base are regular squares and rectangles. You can make the tabs for the lid a little longer so that it does not open by itself. The main thing is to glue all the corner joints well along the entire length and press them until they grab.
4. Flat paper box
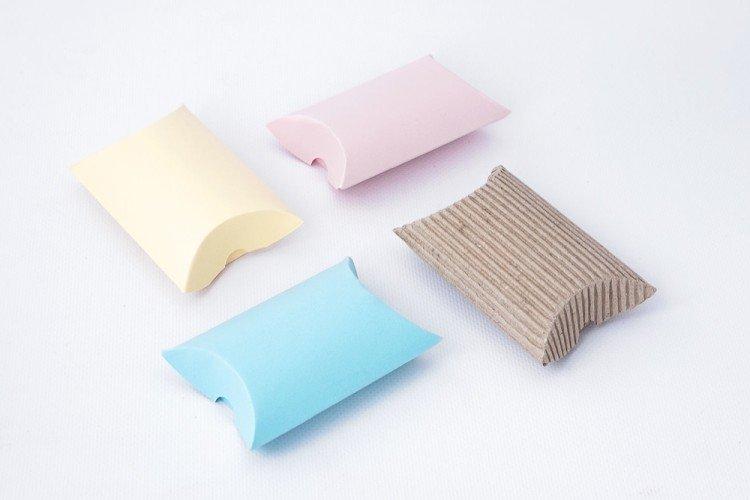
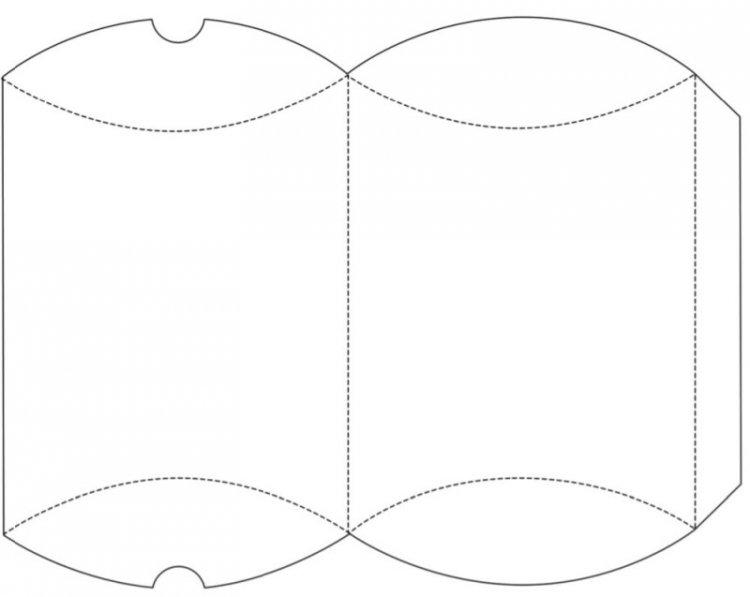
The neat and almost flat box resembles a packaging for pies. It can be made from one sheet of thick paper and with only one glued seam. The main thing is to tuck the folds-flaps very well and carefully so that they go in an arc and do not wrinkle.
5. Heart-shaped box
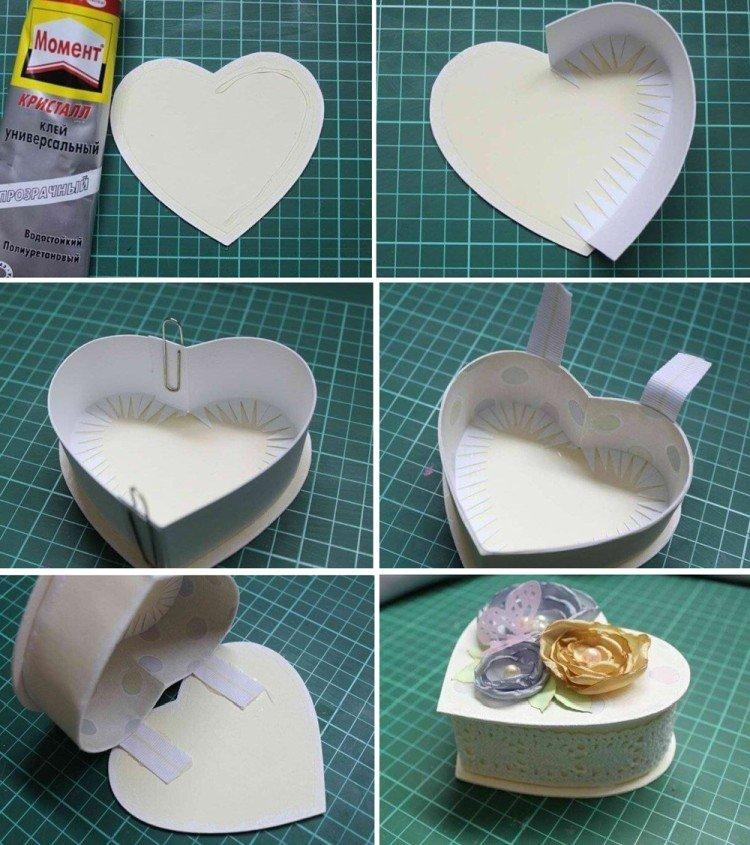
For such a stylish package, you will need very thick paper or even cardboard. To make the contours of the heart perfectly even and symmetrical, make a markup of two circles. For the side wall, several straight segments are needed so that their length is enough for the circumference of the heart.
The width of the side walls is at your discretion, but be sure to leave indents-tongues to glue the wall to the bottom. And to hide the gluing and seal the bottom, you can cut out another heart a couple of millimeters less. Glue the lid in the form of the same heart on two ribbons so that it folds back.
Decorate all interior surfaces with wrapping paper, cloth, or just colored sheets. All that remains is to decorate the box with lace, artificial flowers, beads and other details. Use paints or stencils, but it is better to refuse too heavy decorations so that the paper does not deform.
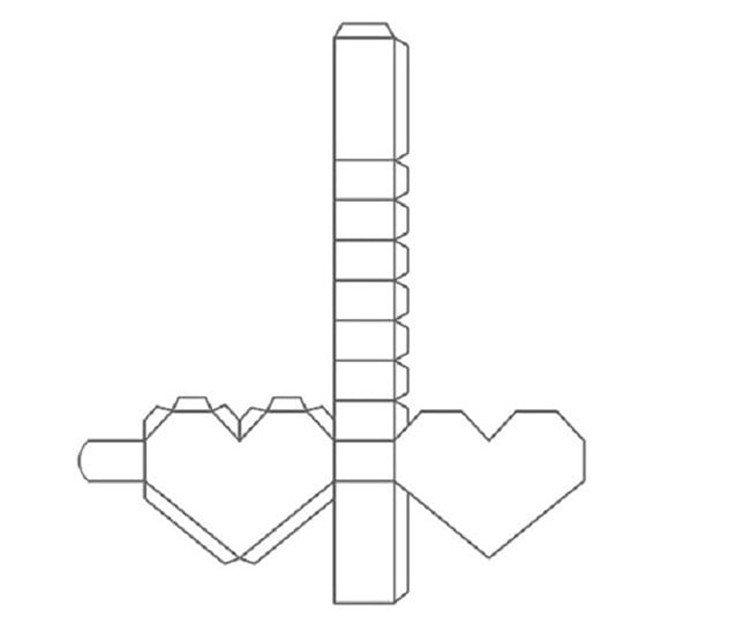
6. One-piece heart box
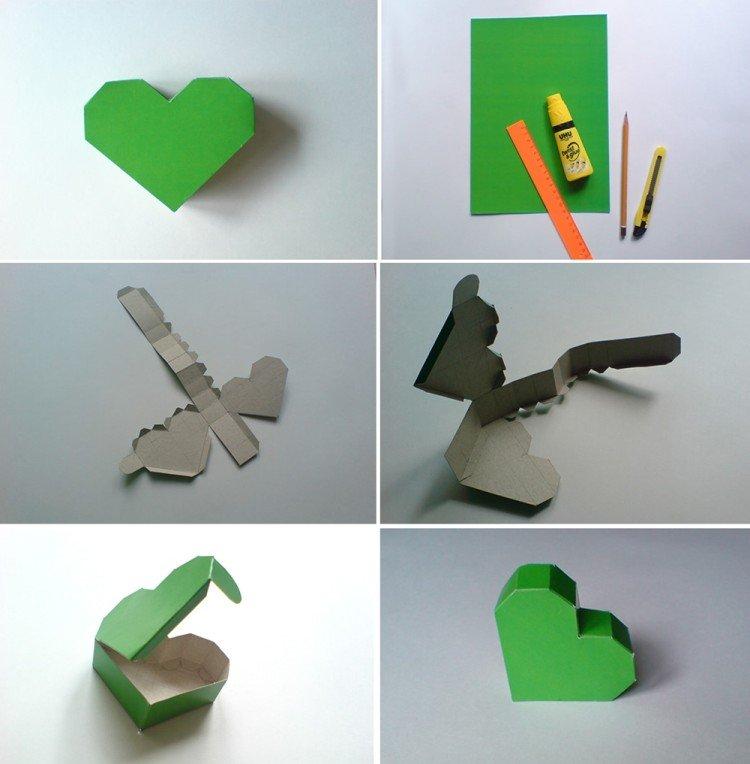
Another heart-shaped box can be made even from one sheet of paper in one continuous piece, but keep in mind that the size will be appropriate. Carefully transfer the diagram, make all the necessary cuts and trace the folds with a non-writing pen. Assemble the box, glue all the joints and let it dry well.
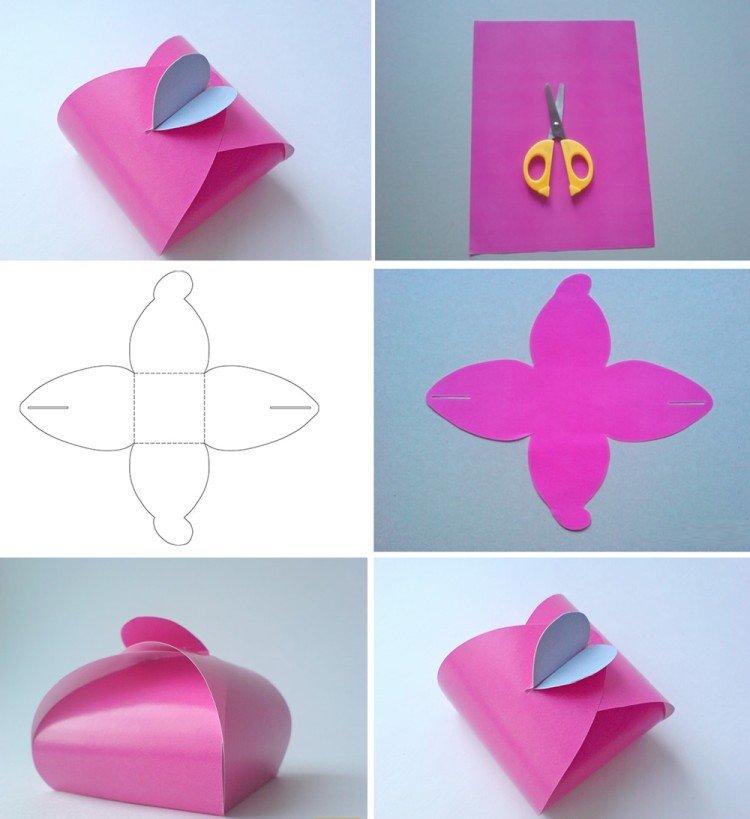
7. Romantic pouch box
All you need is a rectangular sheet of heavy double-sided paper and scissors. Transfer the stencil, keeping the proportions, and carefully cut out the blank with tabs and slots. Make bends along the square of the bottom and collect the petals upwards - you get a kind of bag.
8. Box-pyramid made of paper
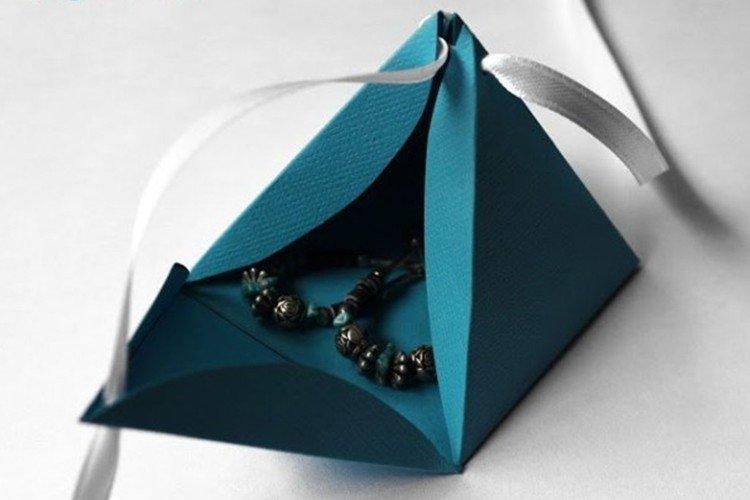
Small boxes in the form of pyramids look very fresh, stylish and laconic. They do not need glue, tape or paper clips, and it will be closed by a tie-string. Transfer the stencil to heavy paper, cut out, fold all the indents to the middle and make small holes in the tops of the petals. Pass a decorative cord or a thin satin ribbon through the holes and tighten.
