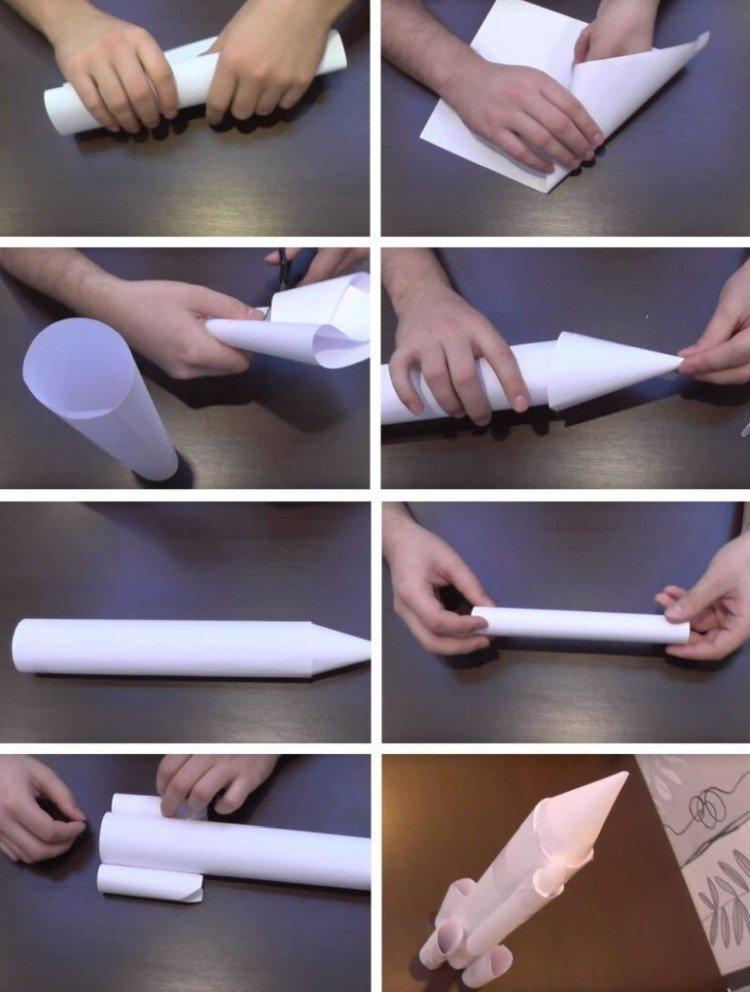
Paper crafts are a favorite hobby of most kids. Adults thus relax and relieve stress after a hard, nervous day. And such a hobby does not require the purchase of expensive consumables at all. Today we will show 10 diagrams of how to make a beautiful paper rocket with your own hands!
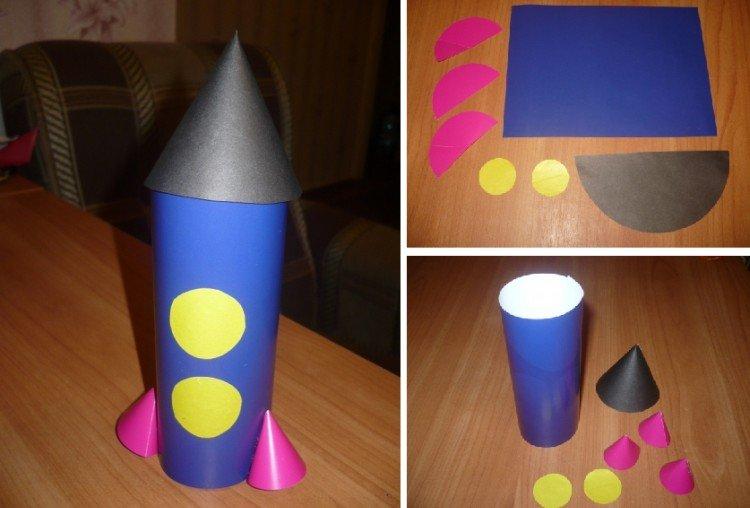
1. Paper rocket for kids
Roll a cylinder out of a rectangle, and a cone for the top from a semicircle. Separately glue the portholes and side supports in the form of small cones. If you want the rocket to be a little more stable, take heavier paper or thin cardboard for the base. This is the perfect craft for kindergarten: extremely light, understandable and bright.
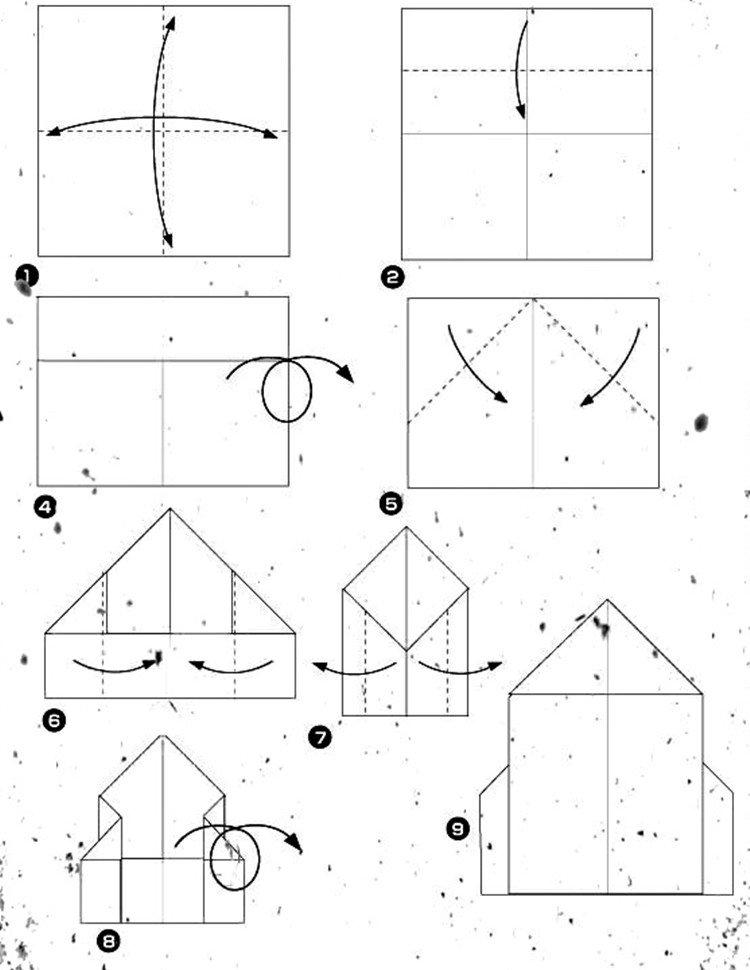
2. A simple rocket for beginners
This is a very simple origami scheme that even small children can handle in a few steps. The rocket folds like a house, only then you still need to bend the sides with steps to the opposite side. The finished craft is perfect for appliqués, decorating postcards or creating holiday packages.
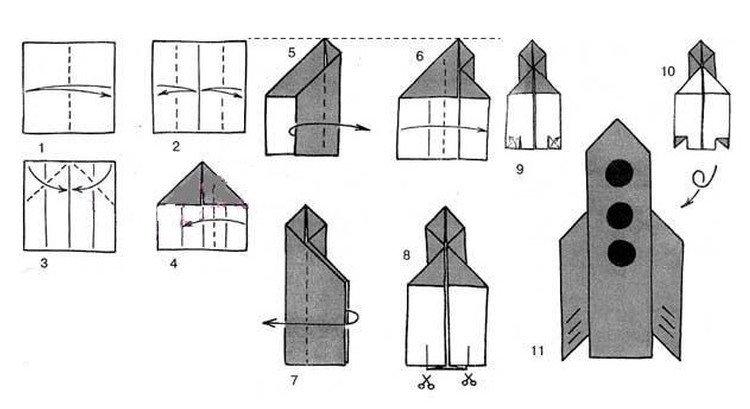
3. Simple rocket with notches
This scheme is very similar to the previous one, but at the same time it is slightly different. Thanks to the small notches on the bottom, the side supports are more expressive and realistic. This scheme looks good even from one-sided colored paper, and from above add portholes and other little things.
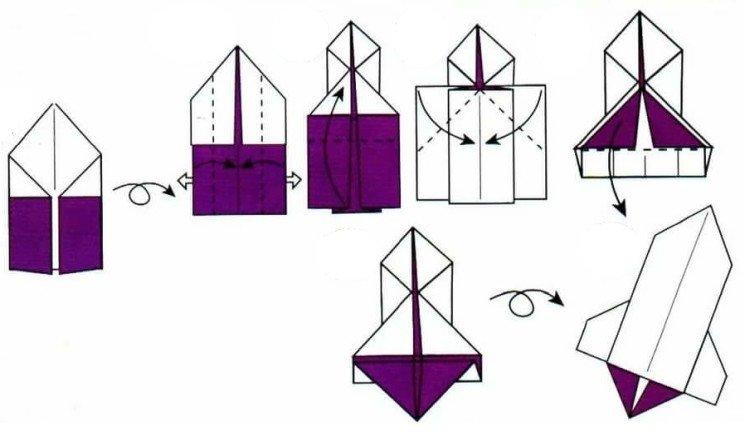
4. Origami rocket with colored fire
Such an origami rocket looks interesting from one-sided colored paper, and it is the fire that remains bright, and the frame itself is white. Place the rectangle with the white side up, fold back a piece back to a square. Shape the corners and sides to create a kind of house. Turn the workpiece over, form the side walls with a ladder, unfold again and spread the colored fire downward.
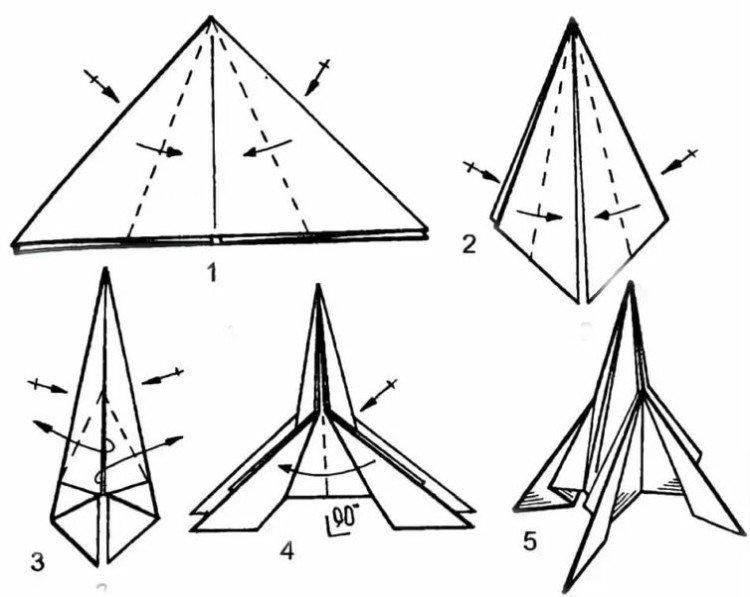
5. Pointed missile on supports
Fold a standard origami triangle out of a square and fold the sides towards the center - all four separately. Do the same again to create a thin, elongated diamond with a pointed nose. From the lower tails, use a ladder 90 degrees to the table to form the rocket supports.
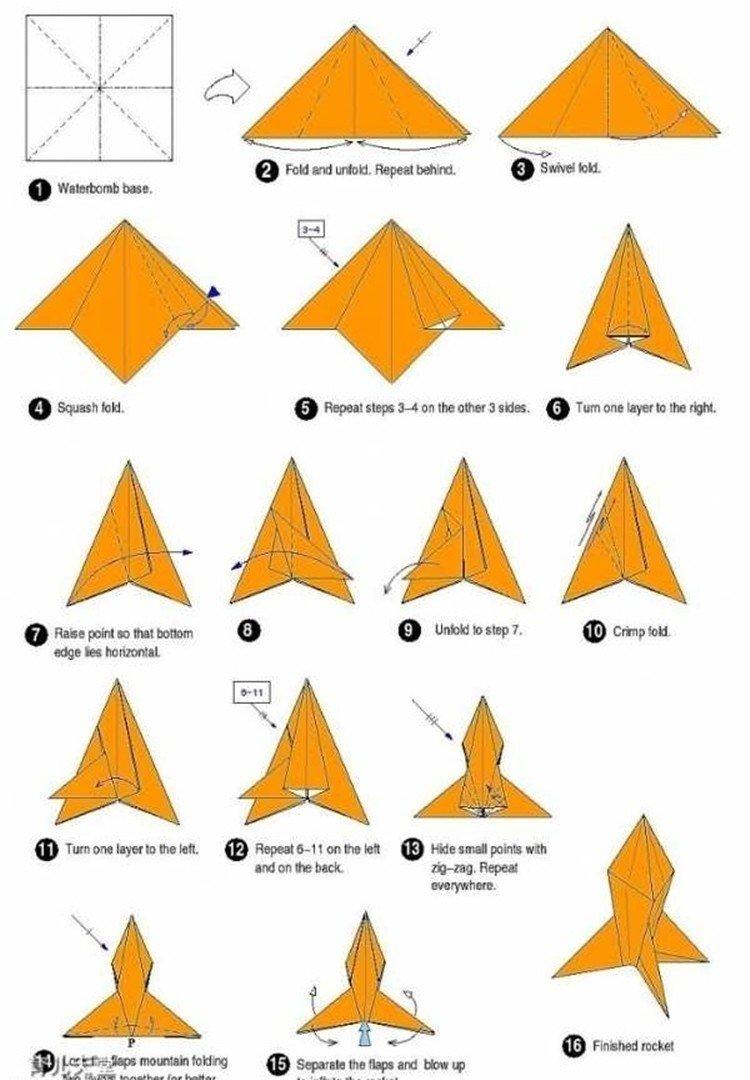
6. Origami paper rocket
This diagram resembles the previous one and begins in the same way with a standard origami triangle. Fold the sides to the middle and fold each corner into a thin rhombus on all four sides separately. Use a ladder to wrap the side supports, hide the fold under the base of the rocket and form a curly transition.
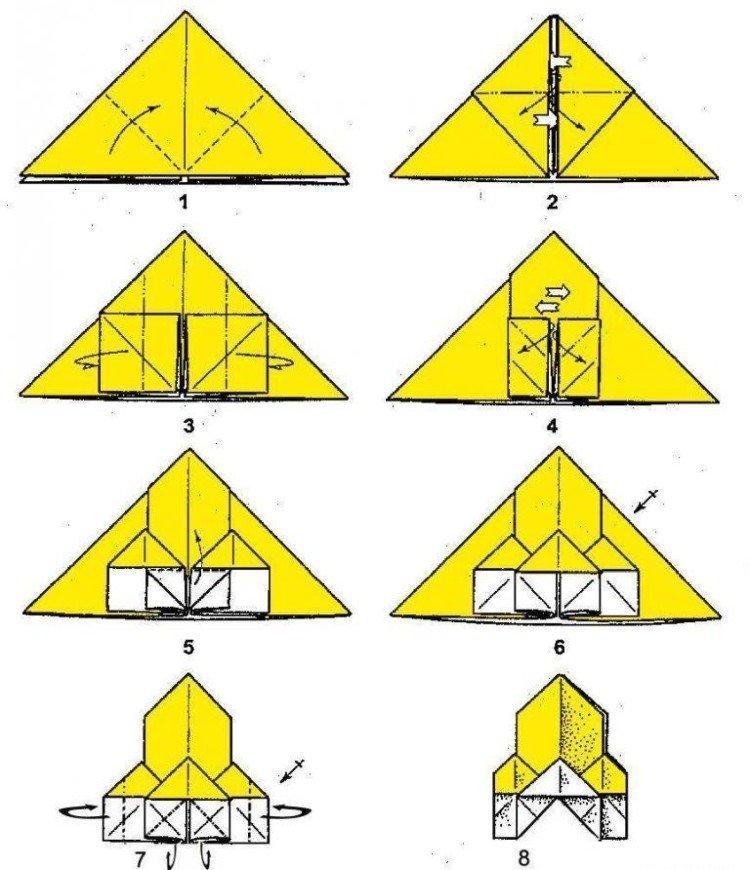
7. Wide origami rocket
Another similar scheme from the base triangle differs from the previous ones in that the finished rocket turns out to be much wider. Fold the bottom corners up, fold each of them into a square, fold them in half and fold them out again. Tuck the central part and unfold it into another similar, already third, house.
8. Rocket from two parts
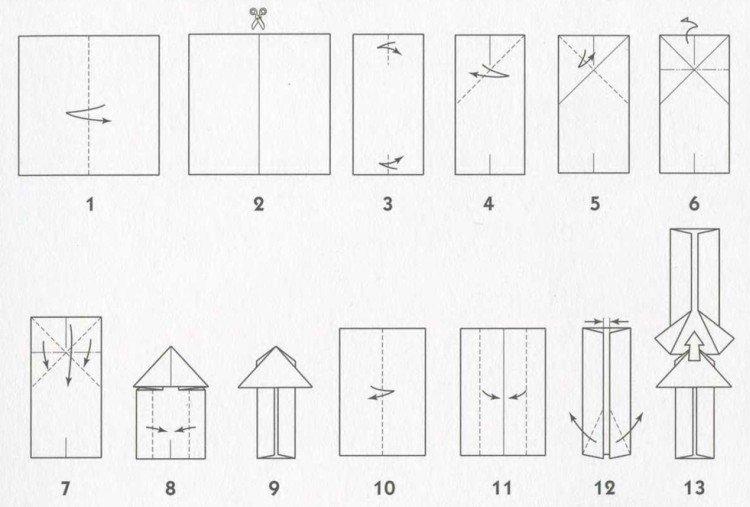
Cut the paper square in half and work on both pieces separately. In the first, form a triangular top according to the standard origami pattern and fold inward on the side. At the second, bend the side supports of the rocket to the sides and insert the first part of the blank into it.
9. Rocket made of cardboard bushings
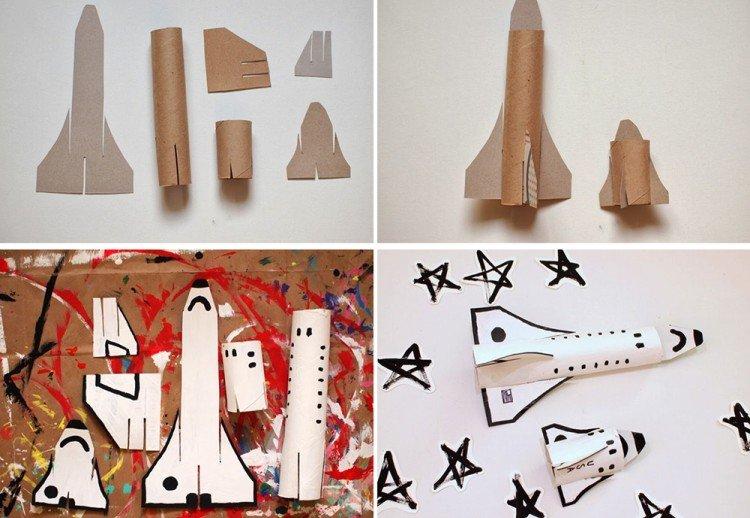
If you want to build a bigger and more durable model, take a sheet of cardboard and cylindrical sleeves. A base from any roll paper or paper towels will work. Cut out the main parts and make side cuts to connect them like a simple 3D puzzle. Before assembling, paint and paint the rocket with gouache with PVA or acrylic paints.
10. Rocket from cylindrical modules
Twist a cylinder out of a dense rectangle: the smaller the diameter, the stronger it is. Make a few smaller and lower thin cylinders for the second module and support. Roll a slightly larger cone out of the same paper and put it on top, like the nose of a rocket.
