Lighting is one of the main components of any interior. The correct supply of light, the play of shadows and reflections - all this fills the house with extraordinary coziness and comfort. A hand-made lamp shade for a lamp is a special detail that will add a touch of exclusiveness and make your home stand out from all others. In the article, we have compiled a selection of 15 ideas on how to quickly and easily make a plafond with your own hands!
1. Original shades from bottles
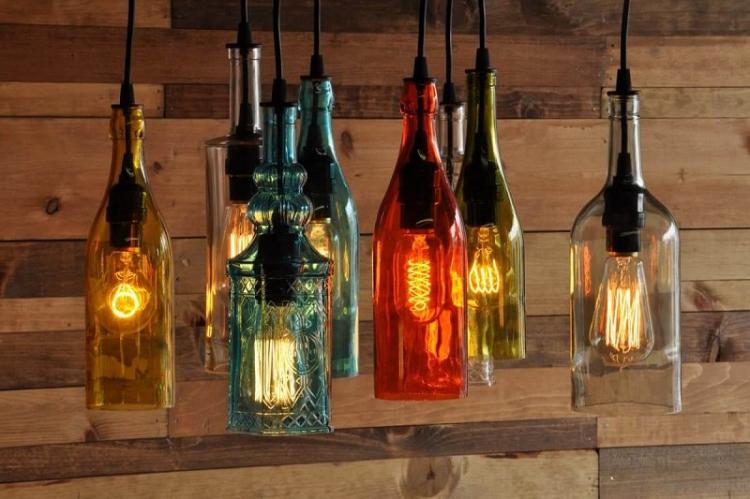
If after the holiday you have empty wine bottles, do not rush to throw them away - they can "give" a second life by decorating them under shades. Such hanging structures will look great in the kitchen, especially as a bar counter lighting.
The most time consuming moment is cutting the bottom. This can be done with a glass cutter or thin rope. A rope, previously soaked in any flammable liquid, should be wrapped around the bottom of the bottle and set on fire. When the flame has completely bypassed it, immerse the bottle in boiling water and then in ice water. After this procedure, the bottom will break off.
Now all that remains is to mount a socket with an electric cable, screw in a light bulb with a beautiful spiral and enjoy a pleasant soft glow.

2. Plafond made of ribbons
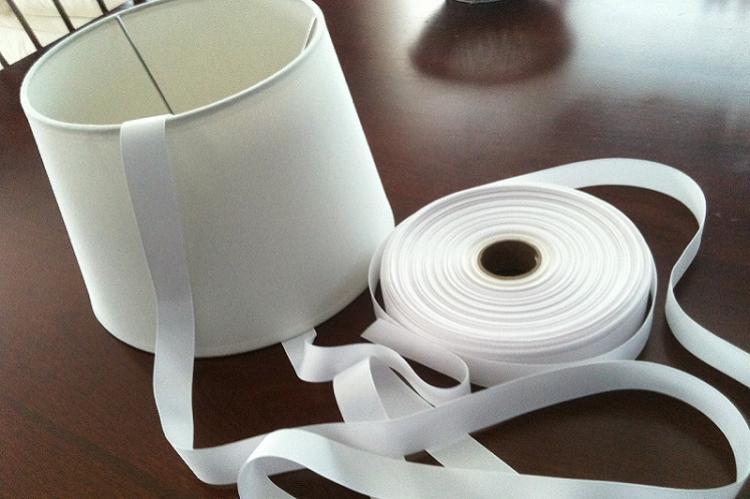
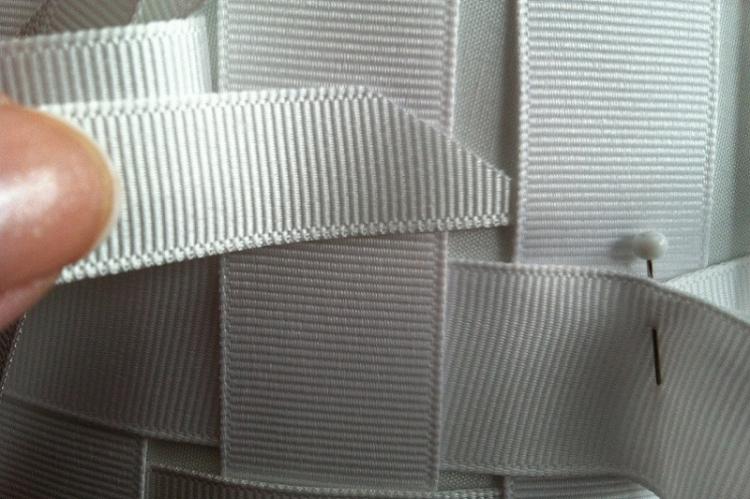
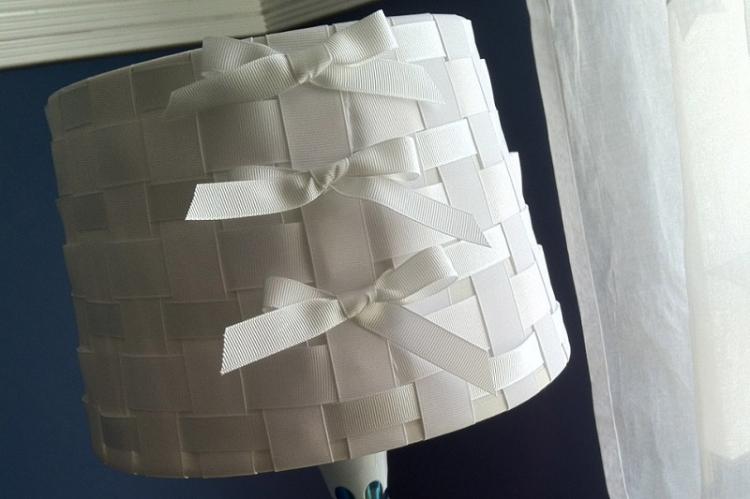
Ribbons are a great way to update an old lampshade. First, get rid of the old coating and prepare the material. The plafond can be made in one color or ribbons of different colors can be used. The color is matched to the tone of the interior or vice versa - contrasting, to create an accent zone.
Attach the tape to the inside of the lampshade (to the top rim) and start wrapping from top to bottom. Winding density depends on how soft you want the glow to be. If you overlap the tape, the plafond will create a warm, diffused glow, and at intervals, you will get interesting lighting effects.
The frame can be pre-covered with fabric for density, and the ribbons can be bound in a checkerboard pattern. You will get a pretty Provence plafond.
3. Wire shade
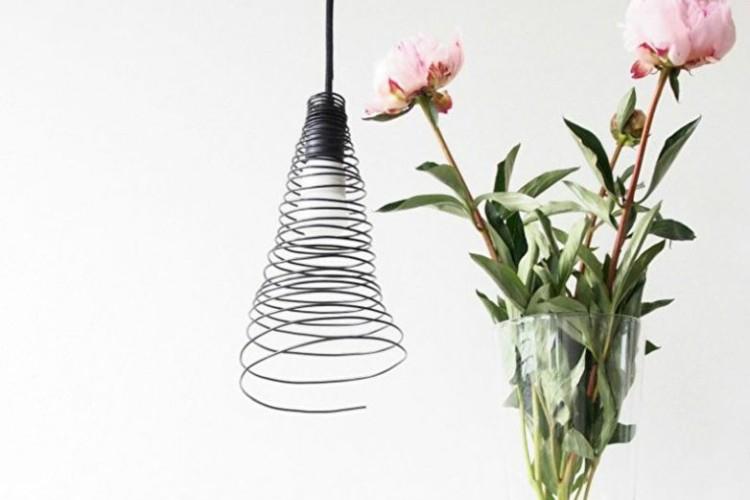
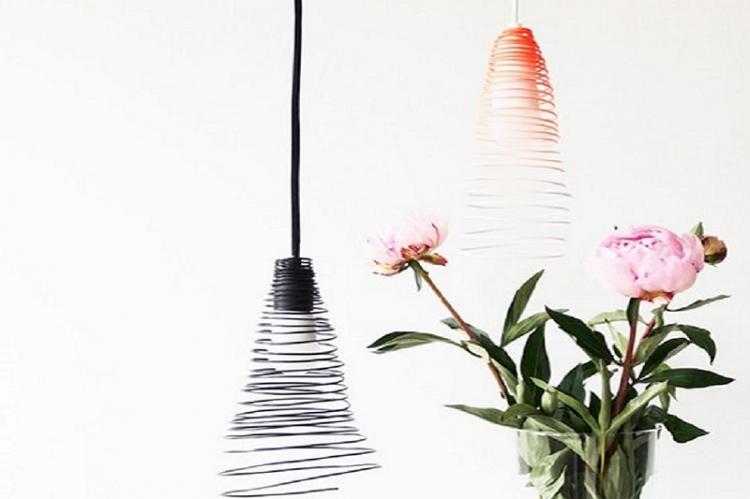
A laconic wire shade is perfect for any modern minimalist direction (loft, hi-tech, modern). These lampshades can be used to decorate an ensemble of pendant lamps, for example, over a bar counter or other light sources.
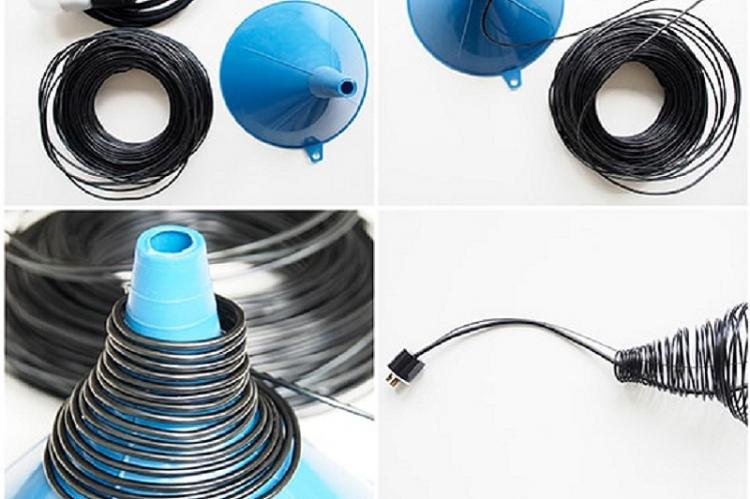
All that is needed for work is wire, pliers and an ordinary watering can, the height of which will determine the dimensions of the future plafond. If you are planning a group of lamps, you can make them in one or different colors.
Take a watering can and, starting from the top, wrap it with wire to the very bottom. Compartments with pliers the remainder, pass the switch. The plafond is ready!
4. Homemade thread chandelier
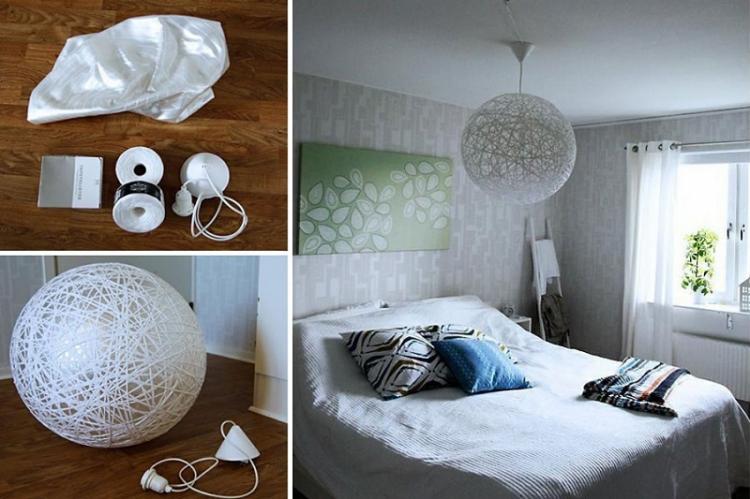
There is nothing easier than making an airy shade from threads. Inflate the balloon to the desired size, wrap with cling film. Next, we take a thread, dip it in glue and wrap it around a ball.
Now you need to wait a little until the structure hardens, then pierce the ball with a needle and remove it along with the film. The level of illumination will depend on how tightly the thread is wound.
5. Plafond with fringe
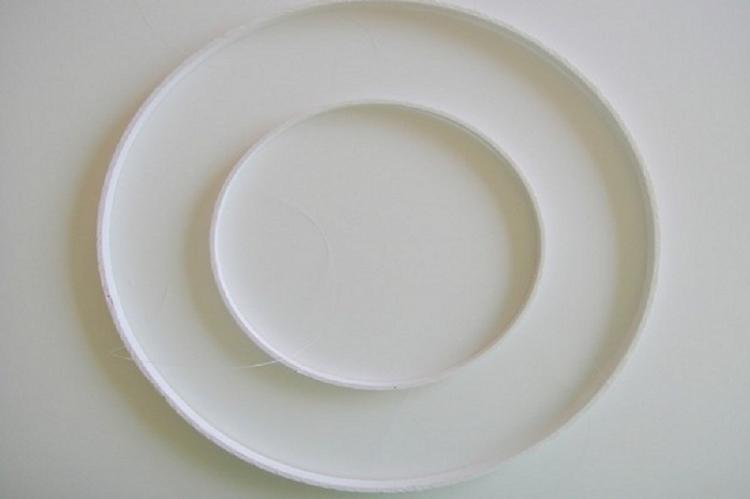
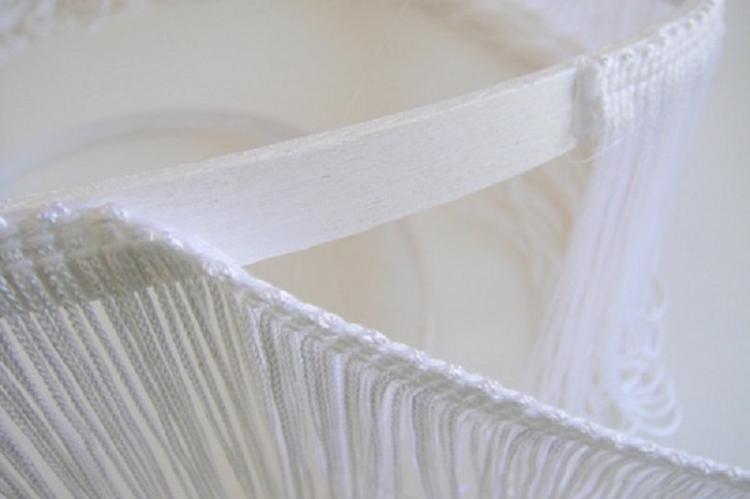
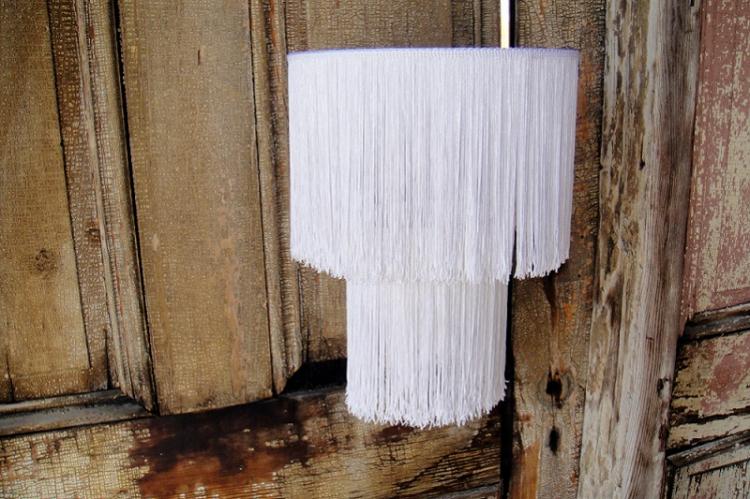
Using two metal hoops (you can take a hoop) and a fringed braid, you can construct a two-tier lush chandelier.
Use sturdy fishing line to secure the hoops, and the fringe is best secured with a glue gun.
6. Lush balls
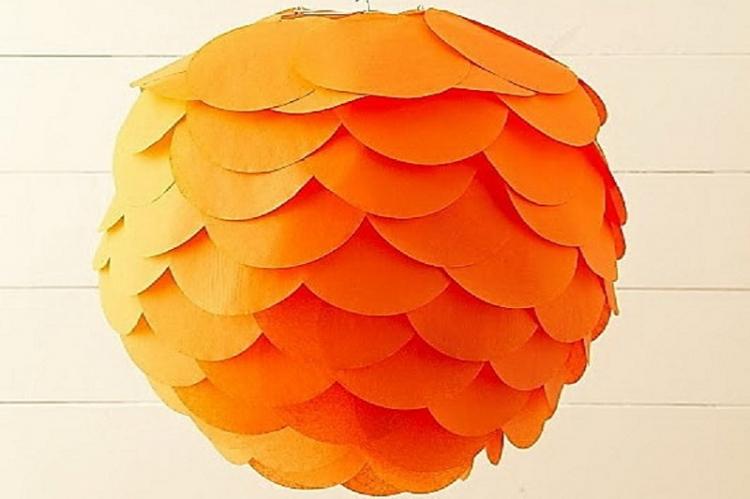
Such a homemade plafond will perfectly decorate a children's room or kitchen, creating a soft pleasant glow. It can be made in any color palette of your choice.
For work, you need to prepare glue, colored paper and a Chinese flashlight (now they are sold in many stores). You can use a lightweight cloth instead of paper.
Cut out circles of the same size from paper (fabric) and paste over the flashlight with them.Details must be glued with an overlap, starting from the bottom - creating a semblance of scales.

7. Plafond made of glass jars
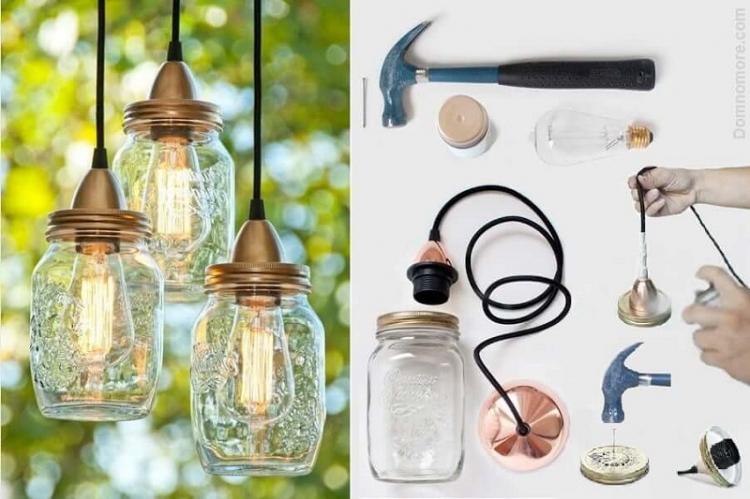
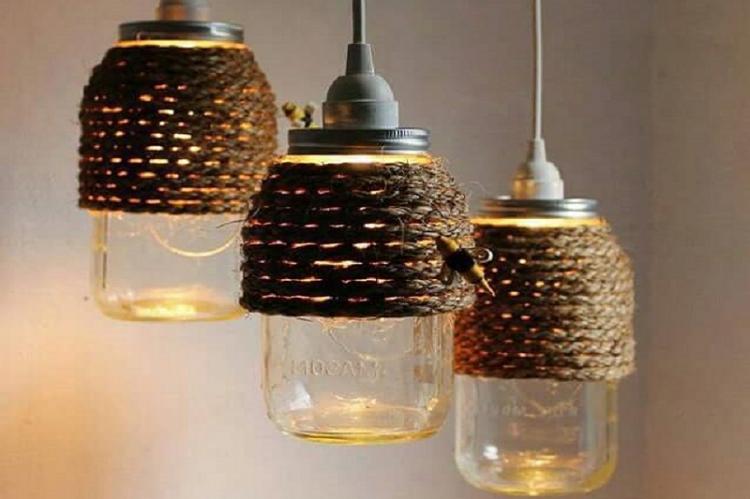
Simple and, at the same time, quite original shades can be made from ordinary liter cans that every housewife has. It is better to take jars with a twist lid - then it will be much easier to change the light bulb.
First of all, we make a hole in the lid, insert the cartridge, the light bulb, and mount the electrical cable. The lid, together with the cartridge, can be painted gold or silver.
The bank can be decorated in advance - pasted over with twine, napkins, or simply paint it. In any case, the result is a beautiful and exclusive chandelier.
8. Shade made of wood strips
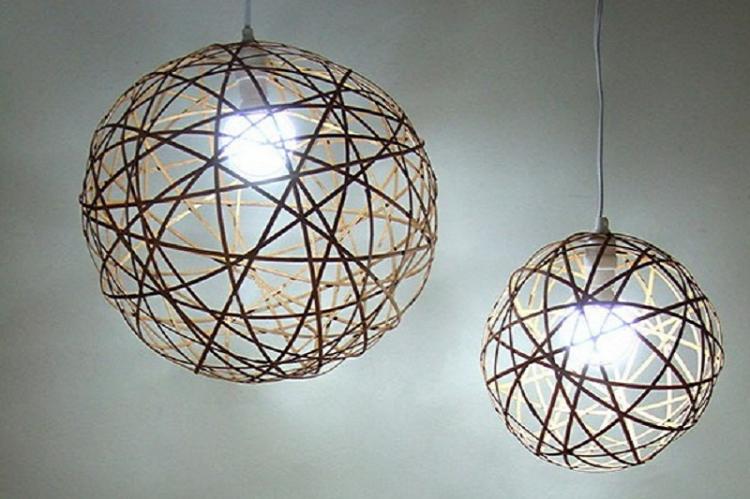
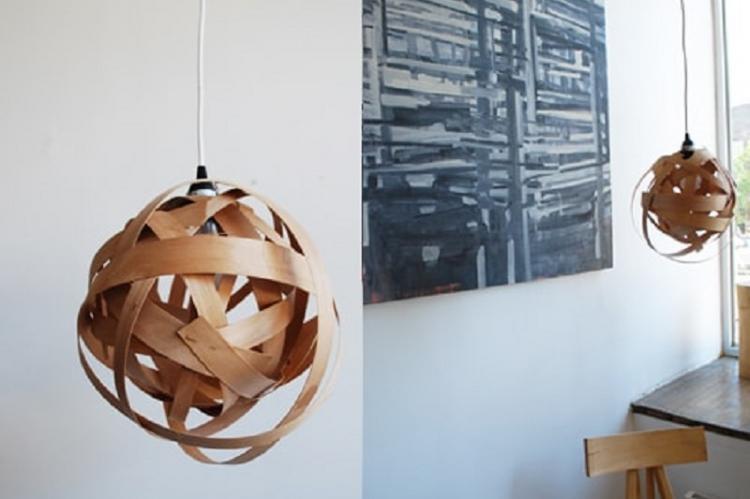
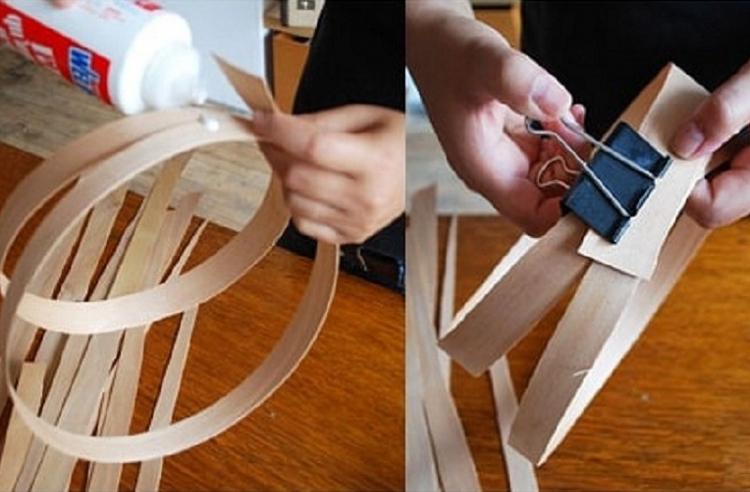
A wonderful veneer lampshade will become a stylish decoration of any interior. To make this beauty with your own hands, you need veneer strips, glue and large clamps.
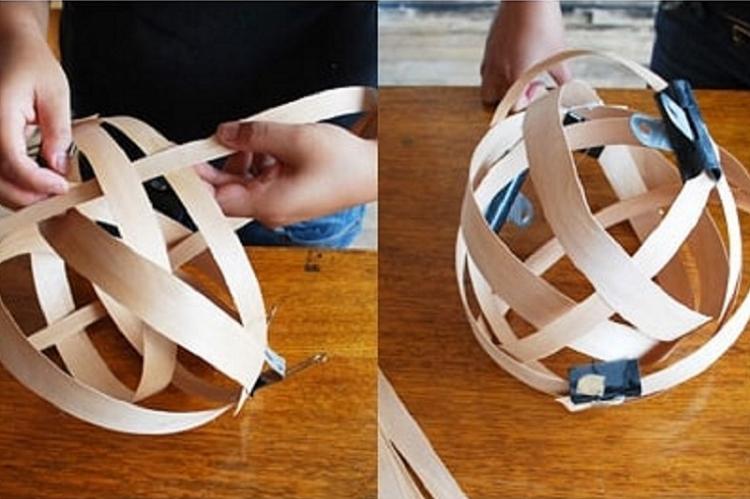
We bend the strip, forming a circle, glue the joints and fix it with a clothespin. We do the same with the rest of the ribbons, forming a spherical shape.
During assembly, several ribbons need to be interlaced with each other in a checkerboard pattern. Try not to place the parts too tightly together, otherwise the light from the lamp will be very dim.
9. Plafond from kitchen utensils
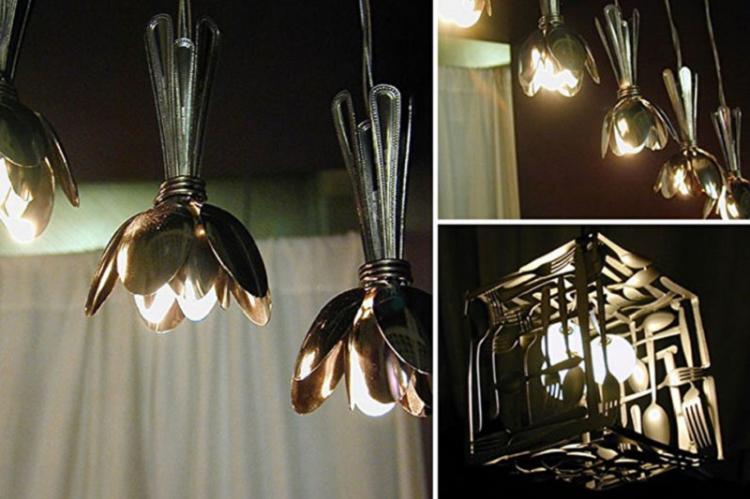
A wonderful shade can be assembled using simple spoons and forks. All that is required of you is to place a dozen devices around the light bulb on the suspension and fix it well with wire.
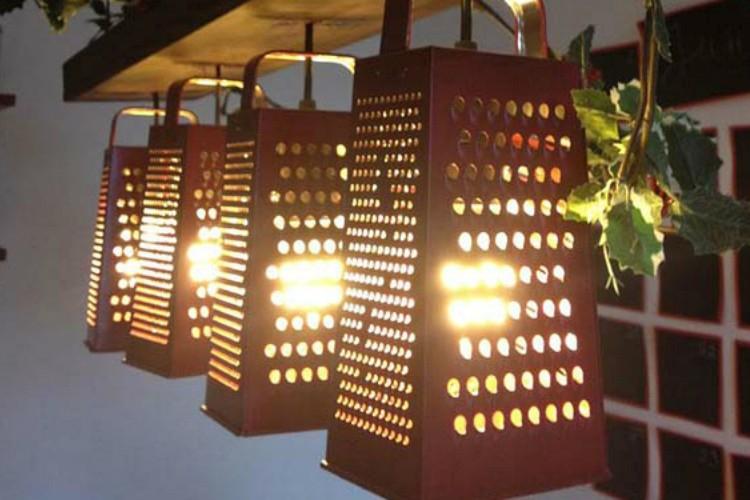
Since the sizes of such plafonds are small, it is better to arrange several pendant lamps with them, forming an ensemble. For the same purpose, you can use other kitchen utensils - for example, graters.
10. Plafond with butterflies
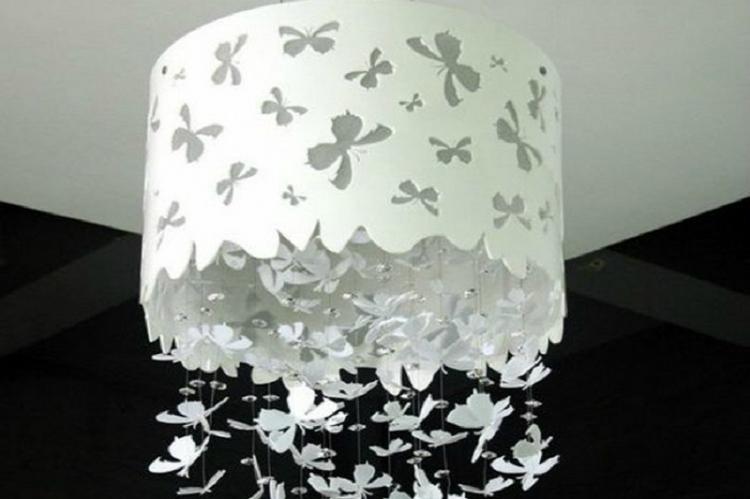
The child's room can be decorated with a wonderful homemade chandelier with fluttering moths. Involve your child in its creation and the process will turn into an exciting joint pastime.
You will need a Whatman sheet. It is necessary to measure the required height of the shade and the length of the sheet, which will be wrapped around the frame. We cut out the workpiece. Next, on the back side, draw butterflies in random order and cut them out with a sharp construction knife. These beauties will serve as suspensions for our chandelier. Additionally, you can cut more of these moths from a separate sheet.
We wrap the frame with Whatman paper and complement the composition with butterflies suspended on a fishing line. In the evening, when the chandelier emits light, many shadows of various moths will appear on the walls and ceiling.
11. Plafond from knitted napkins
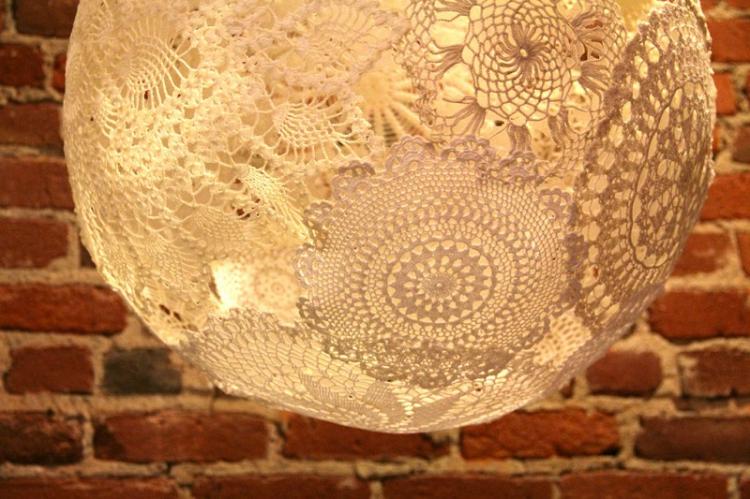
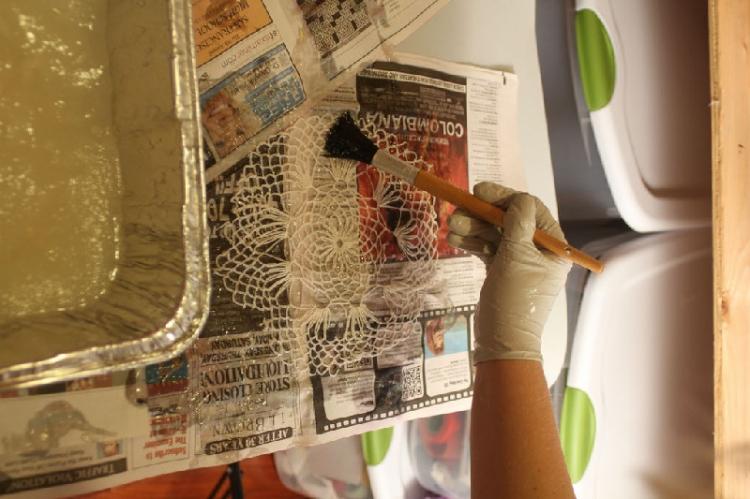
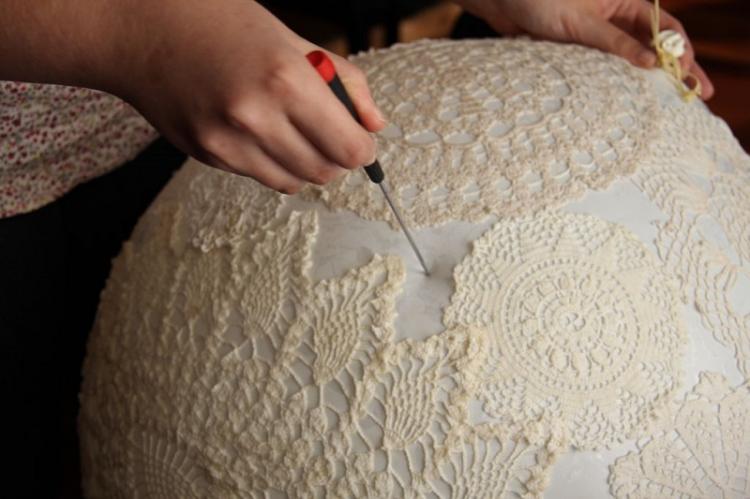
An openwork shade can be made from knitted napkins. Its stunning highlights will create a homey feel and a warm and peaceful ambience in the interior.
To form a frame, you will need an inflated balloon, glue (it is better to take wallpaper), napkins and a brush. The ball must be fixed in a suspended state. We dilute the glue according to the instructions.
We carefully grease each napkin with glue on one side and press it against the ball. The parts must touch. After complete pasting, let the ball dry. Then we pop it and carefully remove it. We've got a wonderful knitted shade!
12. Plafond-globe
A wonderful homemade plafond for a children's room can be made from the most ordinary globe. Cut it in half into two equal hemispheres. Make a small hole in the upper part of one half, insert a holder with a light bulb and a holder. The chandelier is ready!
After installing the cartridge, you can glue the two halves back together, resulting in a luminous ball. A more creative option is to make small holes in the globe that "outline" the contours of the continents. Such a lamp will bring a lot of pleasure to the child and will help in the study of geography.



13. Plafond made of tree branches
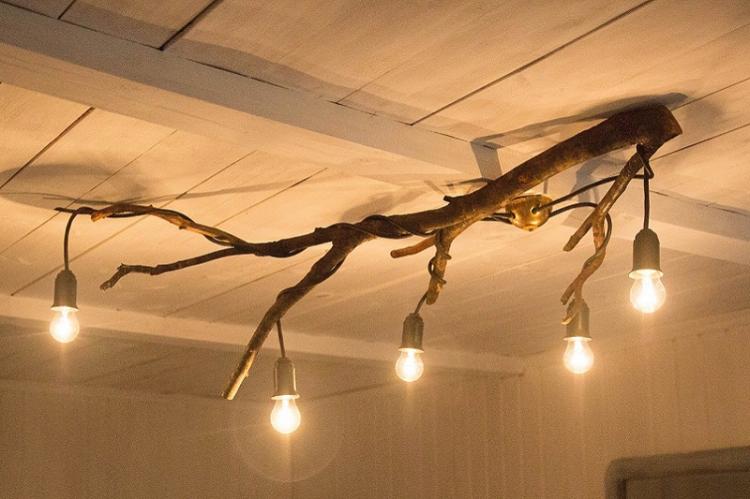
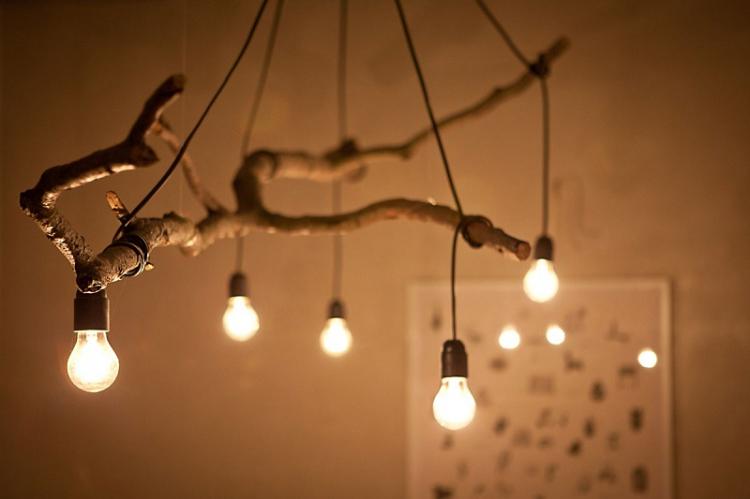
For an apartment in an eco-style or a summer residence, a multi-lamp chandelier made from an ordinary thick branch would be an excellent solution. It is not at all difficult to make it, but the effect will be charming.
The wood must be washed, cleaned, dried and varnished (you can pre-soak it with a stain to get the desired color). Next, fix the branch to the ceiling surface on dowels, arbitrarily hang around with bulbs with bulbs, fixing them with long wires. The plafond is ready!
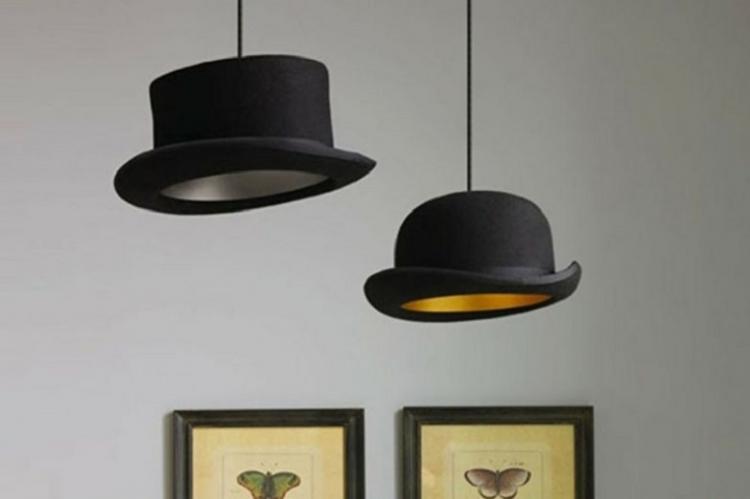
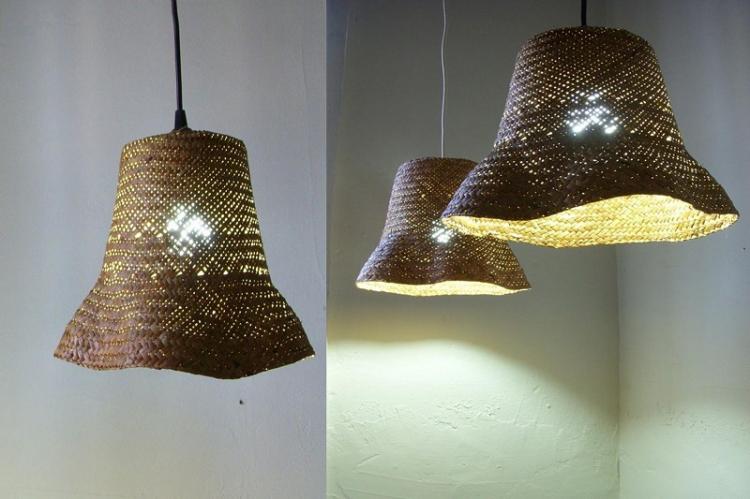
14. Hat shade
What could be more simple and at the same time original than making a shade out of a hat. Such a headdress is probably in the granaries of grandmothers or grandfathers. You just need to clean it thoroughly and string it onto the holder with the cartridge.
The plafond hat will be a successful themed decoration for the hallway or dressing room.
15. Plafond-kettle
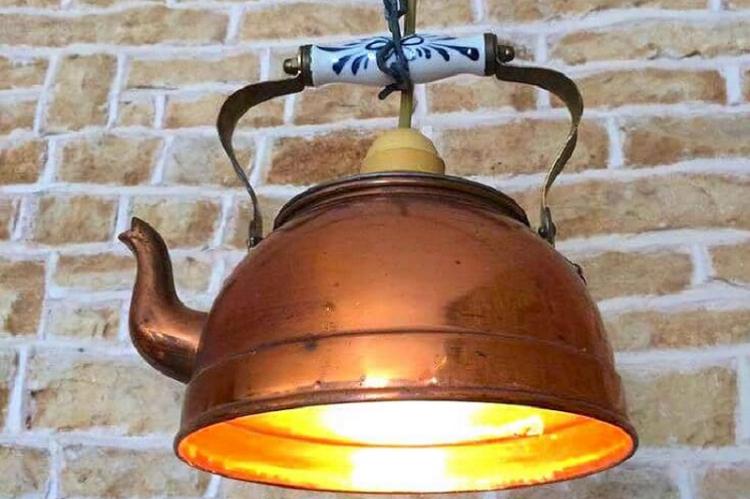
It is quite possible for an old teapot to find a use by making a useful piece of furniture out of it - a lighting fixture. To do this, you will have to cut out the bottom, and arrange a seat for a cartridge with a light bulb in the lid. The hanger must be attached to the handle.
Paint the teapot in a bright color, cover with a pattern or cut with a bronze-like composition, which will give the product a touch of vintage.
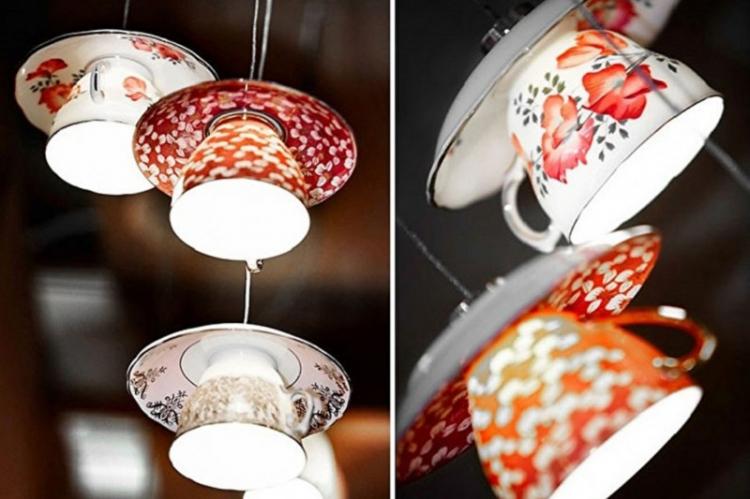
A homemade ceiling lamp from a teapot will become a real decoration of the interior of a kitchen or a country house. If you wish, you can keep him company with pendant lamps with lampshades made from cups and saucers. It will turn out very nice!
