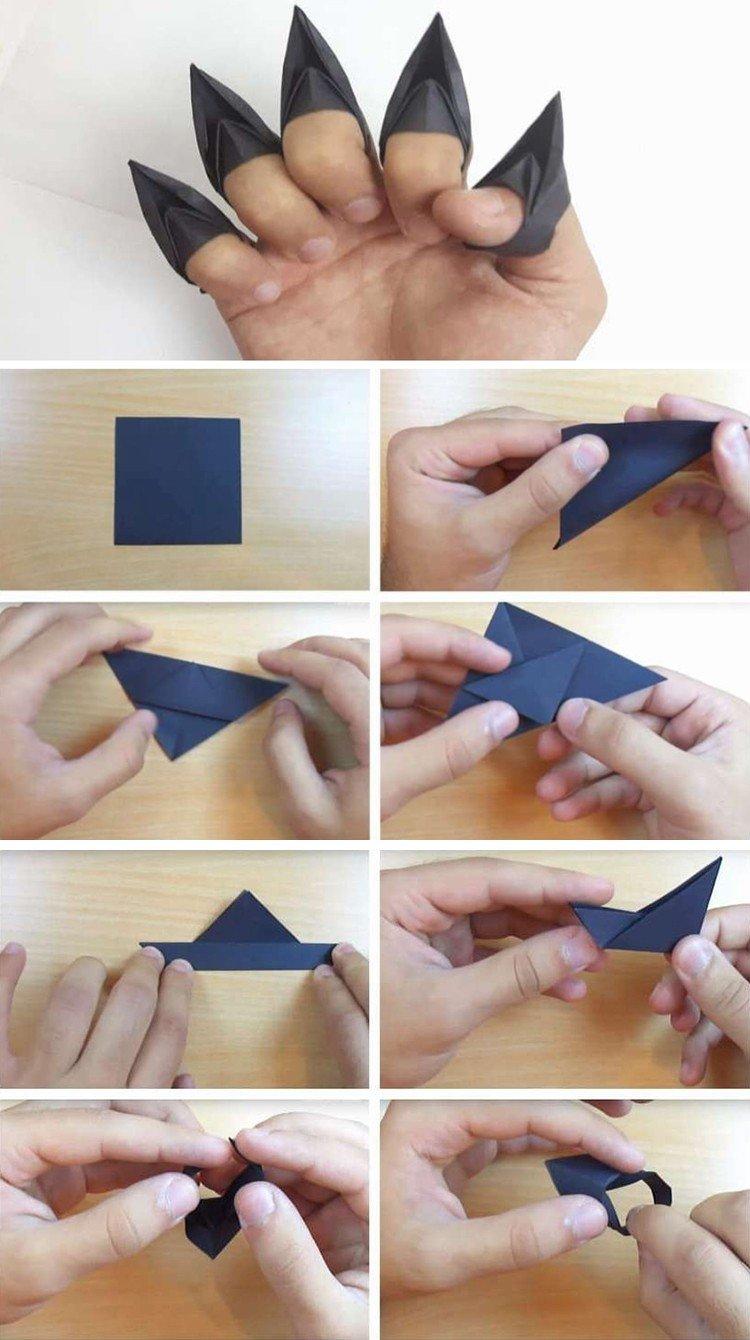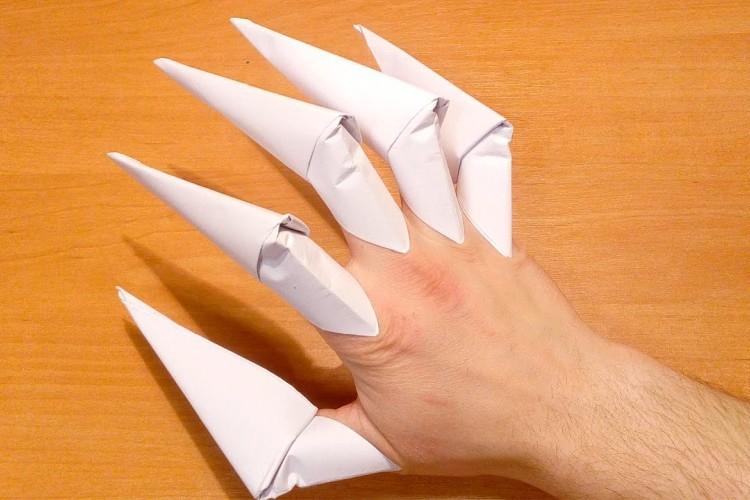
Kids or themed party guests are sure to be delighted with paper claws. Do you think they are too difficult to make? Nothing like this! And we are already ready to demonstrate in practice 7 simple schemes of how to make paper claws at home.
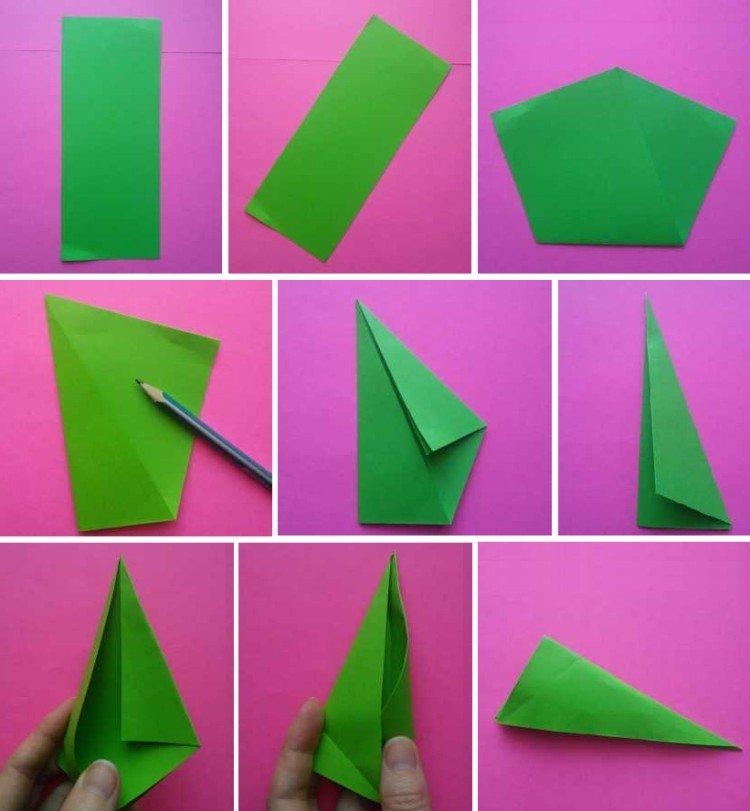
1. Claws from a strip of paper
A rectangular strip of paper with an aspect ratio of at least 1: 3 - 1: 4 bend into an even pentagon. Fold it in half and mark the diagonal from the bottom corner to the top. Lay the side that protrudes more towards it, and again fold the part in half. Insert the small edge into the large pocket to form the claw. Ready!
2. Dragon's claws
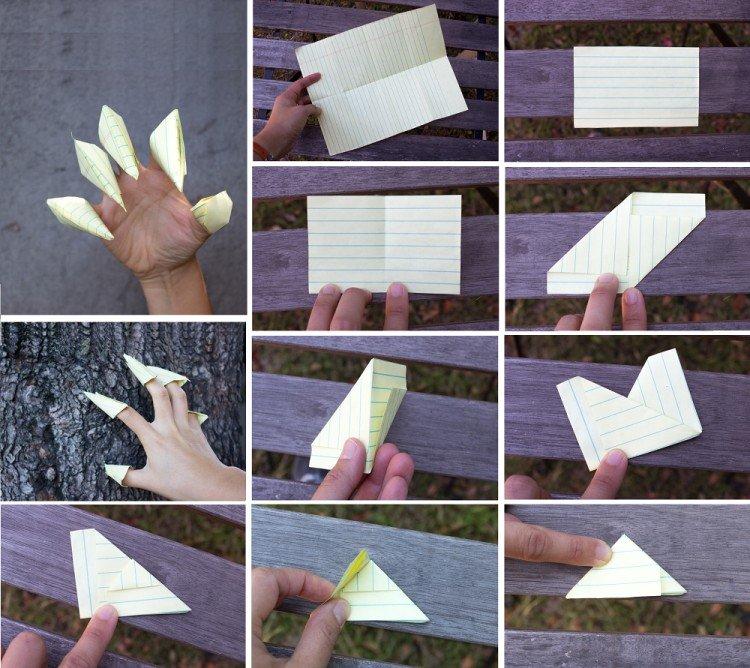
To make small but powerful fingertip claws, cut a sheet of paper into eight pieces. One such blank is needed for the entire claw. It is better to take the sheets denser, because otherwise they will be too thin and wrinkled.
Fold both corners diagonally from opposite sides to the middle of the small rectangle. Expand the part and bend it in the middle to form a kind of "M". Fold the piece in half again and insert one corner into the other to form and secure the claw.
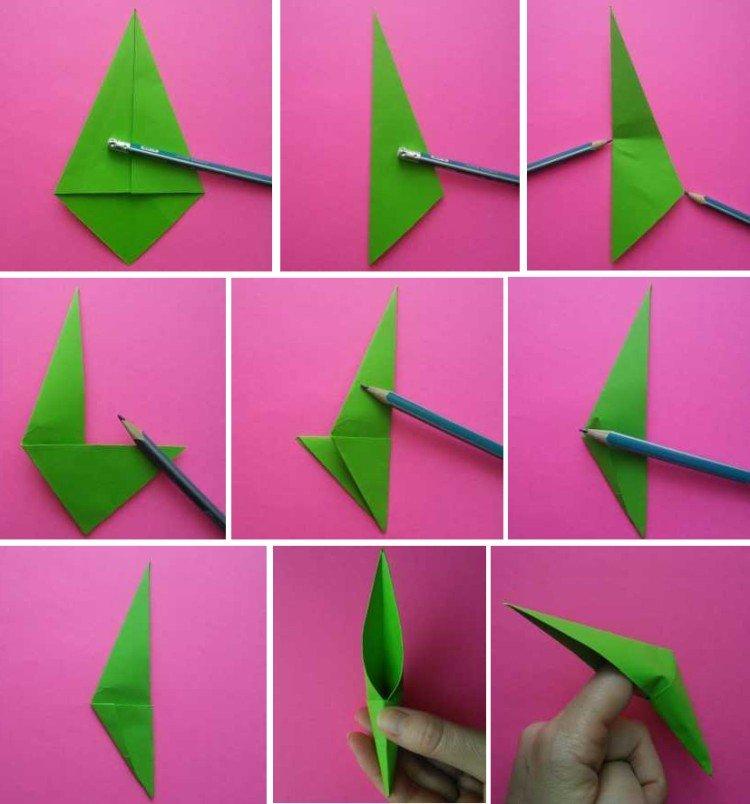
3. Sharp claws on the whole finger
Unfold the paper square towards you and mark the vertical diagonal. Fold both side parts to it from the upper top and fold the workpiece in half with a fold to the left again. Approximately in the middle, fold the lower part to the right and shift the future claw to the other side.
Fold the high triangle along the edge to the side, and use the remaining protruding corner to form a pocket to secure the claw. Carefully put them on the phalanges so that the protruding part covers the finger.
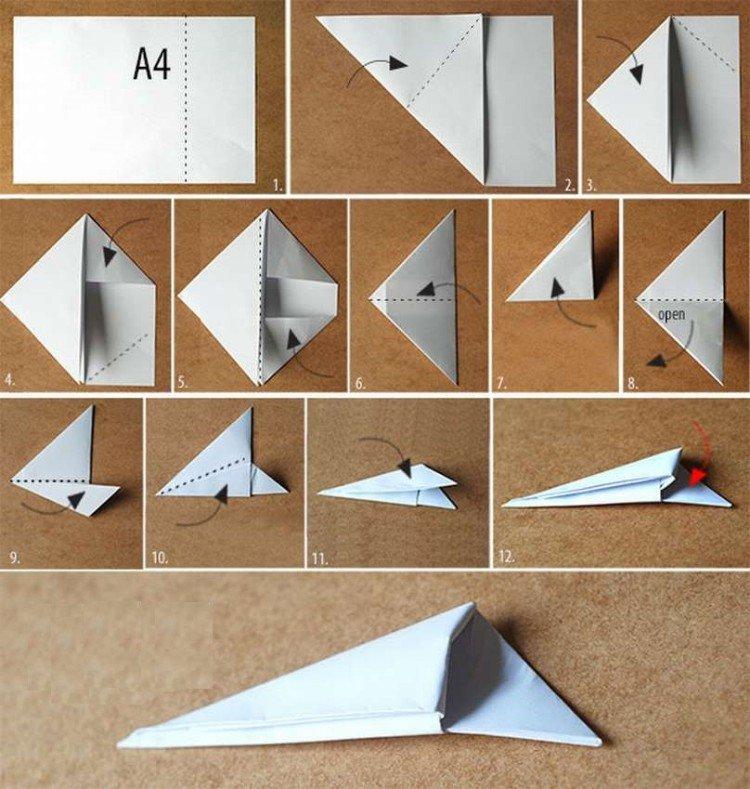
4. Claws from A4 paper
Divide a regular A4 sheet of paper into a square and an elongated rectangle. You don't have to draw the stripes with a pencil - you can just mark yourself visually. Fold the corner of the square diagonally to this line and fold it again into a triangle. Fold the upper and lower corners to the same line to form a trapezoid on the right.
Fold the workpiece in half twice, unfold the last fold and lay the lower part towards it with the tip. Repeat the same on the reverse side to make a cone-cup. Wrap one or both protruding edges inward so that the paper claw holds its shape better and sits firmly on the finger.
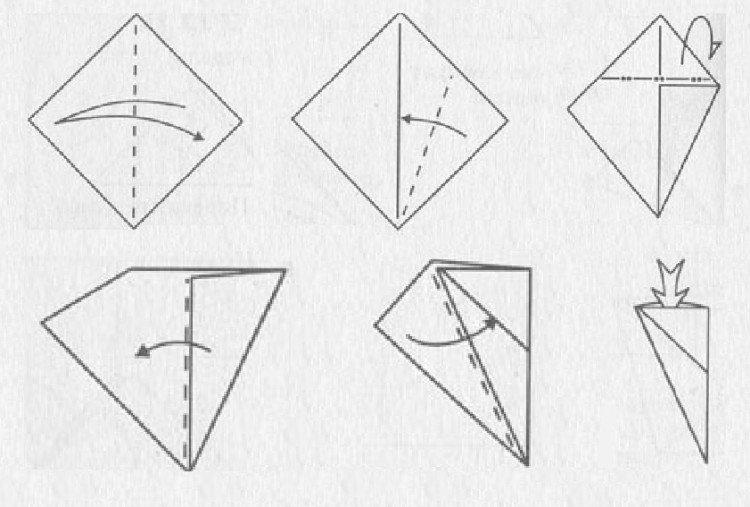
5. Paper claws for beginners
Open an even paper square at an angle to yourself and mark the vertical diagonal. Fold the right side towards it, and lower the upper peak back along the same line. Fold the side triangle along the center fold to the left and insert the free edge into a makeshift pocket.
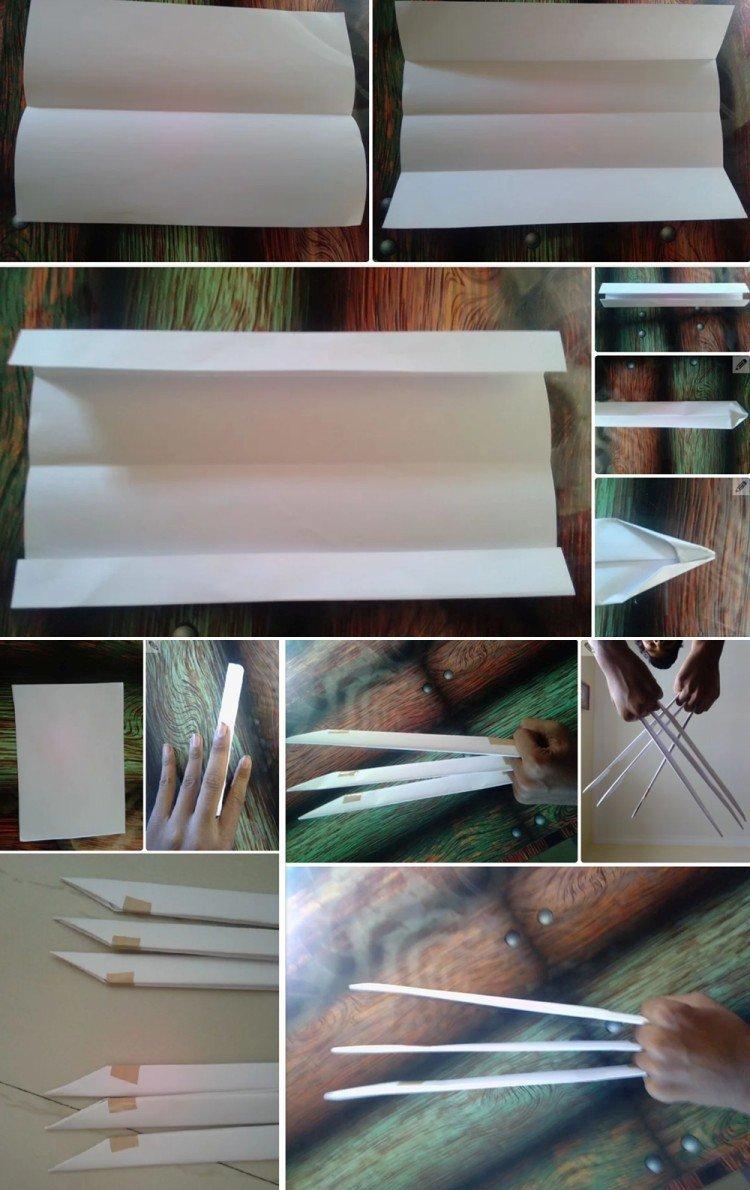
6. Wolverine's claws made of paper
You will need six sheets of A4 paper, each of which needs to be marked into six pieces along the long side. Fold the edges at the top and bottom twice so that they converge at the center. Wrap the corners on one side of the strip, and then again, but more.
Fasten the sharp part and base of the long claws with transparent tape or glue. You can attach three of them to a short paper tube that you will squeeze in your hand. When playing with Wolverine's claws - watch out for safety, because they are long and sharp enough!
7. Small claws on the phalanges of the fingers
Take a paper square, fold it diagonally and fold it in the middle of the resulting triangle. Fold back the top corners and fold back to make it easier to shape the claw on the finger. Finally, fold the bottom of the triangle to the fold line and fold the shape into a ring, inserting the protruding corners into one another.
