
You don't need to be a professional artist to love drawing! It's a great anti-stress therapy, a way to relax, switch, and just relax. Many people start with flowers, because they are beautiful and attractive by nature. Therefore, we have collected 7 step-by-step lessons for you on how to easily draw a rose. Take note!
1. How to draw a rose from a cylinder
The secret to beautiful drawings is always in the right technique, which starts with sketching the basic shapes. For a rosebud, a cylinder is best, which you wrap with beautiful petals.
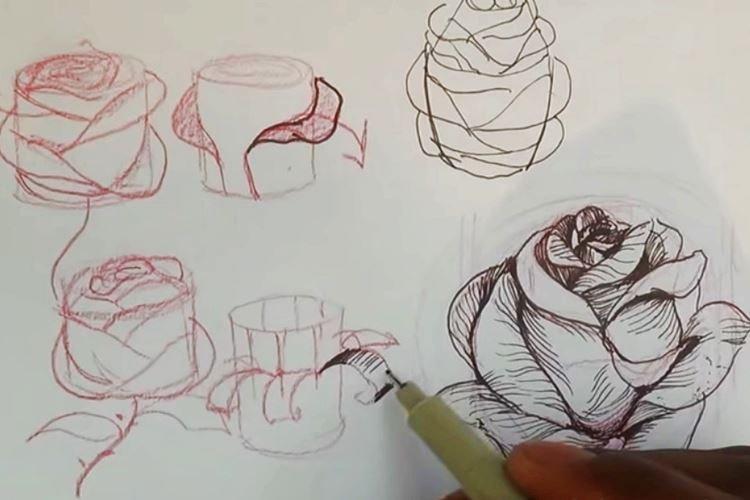
You will need: Paper, pencils, eraser, gel pen.
How to draw: First, draw a cylinder that will determine the size of the rosebud, and a spiral inside to indicate the position of the petals. Imagine that you are manually bending each next petal from the base. Once you've mastered the basic shapes, try marking and shading the shadow.
2. Draw a rose by petals
This technique works equally well for drawing on paper or on a tablet. Here you do not mark the size of the bud initially, but complete it right in the process.

You will need: Paper and pencil or tablet.
How to draw: Start with the very first curl, from which the middle will go up in a spiral. Gradually begin to surround it with larger petals until the bud is harmonious. And don't forget about the leaves and the green base of the rose.
3. Draw a rose with a pencil
If you strive to master classic drawing techniques - this lesson is for you. Train to understand sizes and proportions, lines, shading and chiaroscuro.

You will need: Pencil, eraser on paper.
How to draw: First, mark out the outlines and dimensions of the future rosebud with several lines. Then gradually begin to wrap it with petals in a spiral. Do not rush to draw them right away - make dotted lines to remove unnecessary things and correct the shape.
In the same way, starting with the lines, add a stem with leaves and thorns. Remove all unnecessary sketches, draw the main lines and add some strokes to indicate the color and shadows.
4. Rose in a minute with one stroke
A delicate and beautiful rose with shade transitions can be drawn in just a minute. To do this, you just need a wide brush and a little imagination.
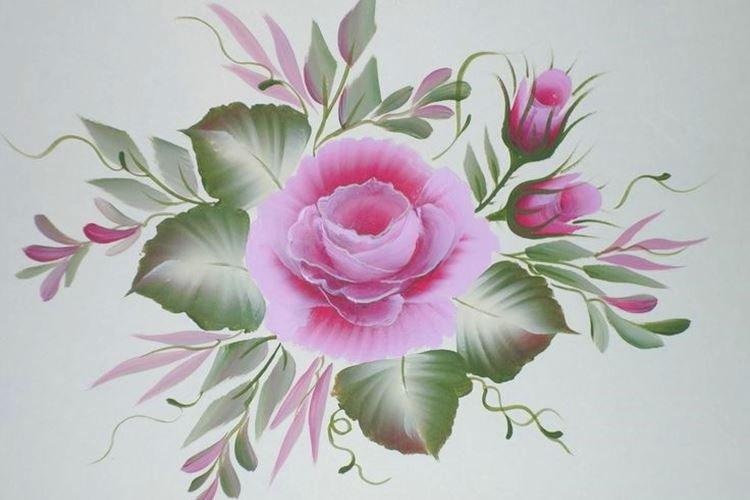
You will need: Wide brush, acrylic paints.
How to draw: Take two colors and blend them with a gradient beforehand so you don't waste time in the process. By the way, if you don't have acrylic, try gouache or any other paint. Each petal is just one rounded stroke.
5. How to paint a rose in watercolor
Watercolors always look very delicate and romantic. And this is exactly the effect that is ideally combined with the same touching and delicate roses.
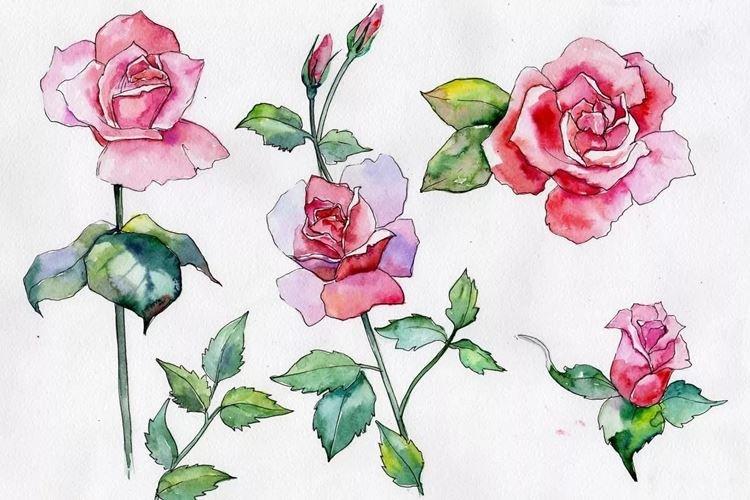
You will need: Paper and watercolors.
How to draw: The technique is interesting in that the petals line up literally from one line. Run it with a clean brush dipped in water, and then add a little paint and take it down with free strokes. Tint the tips and do the next petals in the same way, and paint the stem with leaves thicker.
6. Draw a rose with felt-tip pens and pencils
It seems that felt-tip pens are not made for beautiful transitions and complex color schemes. But this is not the case if you use quality tools and choose the right shades!
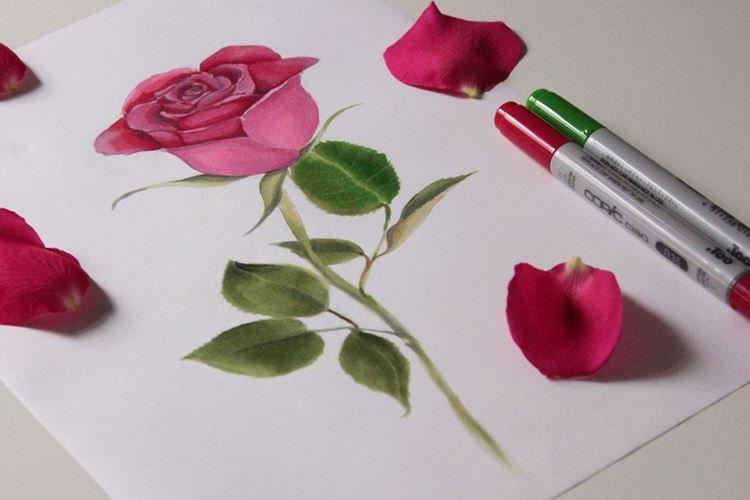
You will need: Thick paper, markers, pencils.
How to draw: Draw the basic outlines of the petals of the future rose with a simple pencil. Paint the petals with felt-tip pens, slowly moving in a spiral and layering the shade. And use pencils at the very end for detail and chiaroscuro.
7. How to draw a rose for the little ones
Such a simple drawing of a rose can be easily repeated even by very young artists. It's perfect for home coloring or even fun prints and stickers.
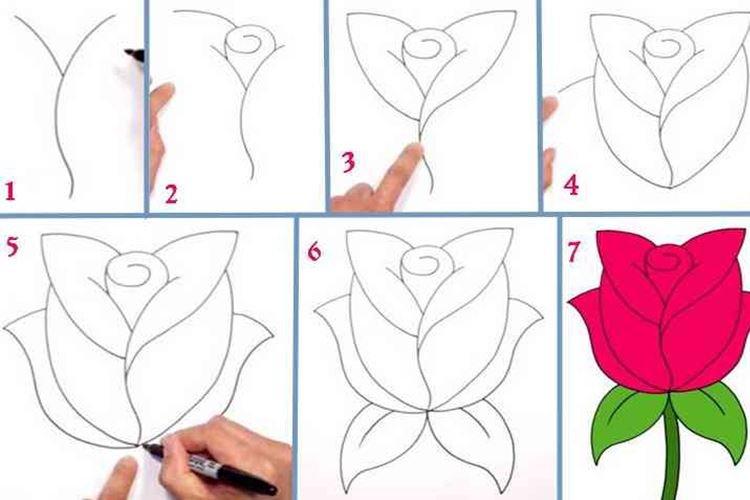
You will need: Marker on paper.
How to draw: Draw a central vertical and build a spiral center from it with side petals. You can color the rose with pencils, felt-tip pens, paints, pastels, glitters or any other materials.


